Most articles about ZBrush for 3D character design read like a software brochure. This one is written from inside the studio. We use ZBrush on real briefs — busts, stylised mascots, creature work, organic detail passes feeding into product or print pipelines — and the software has quirks worth describing honestly.
Character work is not the bulk of what Art Land does. Our main revenue lines are architectural visualization, drafting, product CGI, and animation. But organic modelling and character design are real services we take on when the brief is clear, and ZBrush is the tool we reach for first when a job calls for sculpting rather than polygon modelling.
Why ZBrush for 3D character design at all
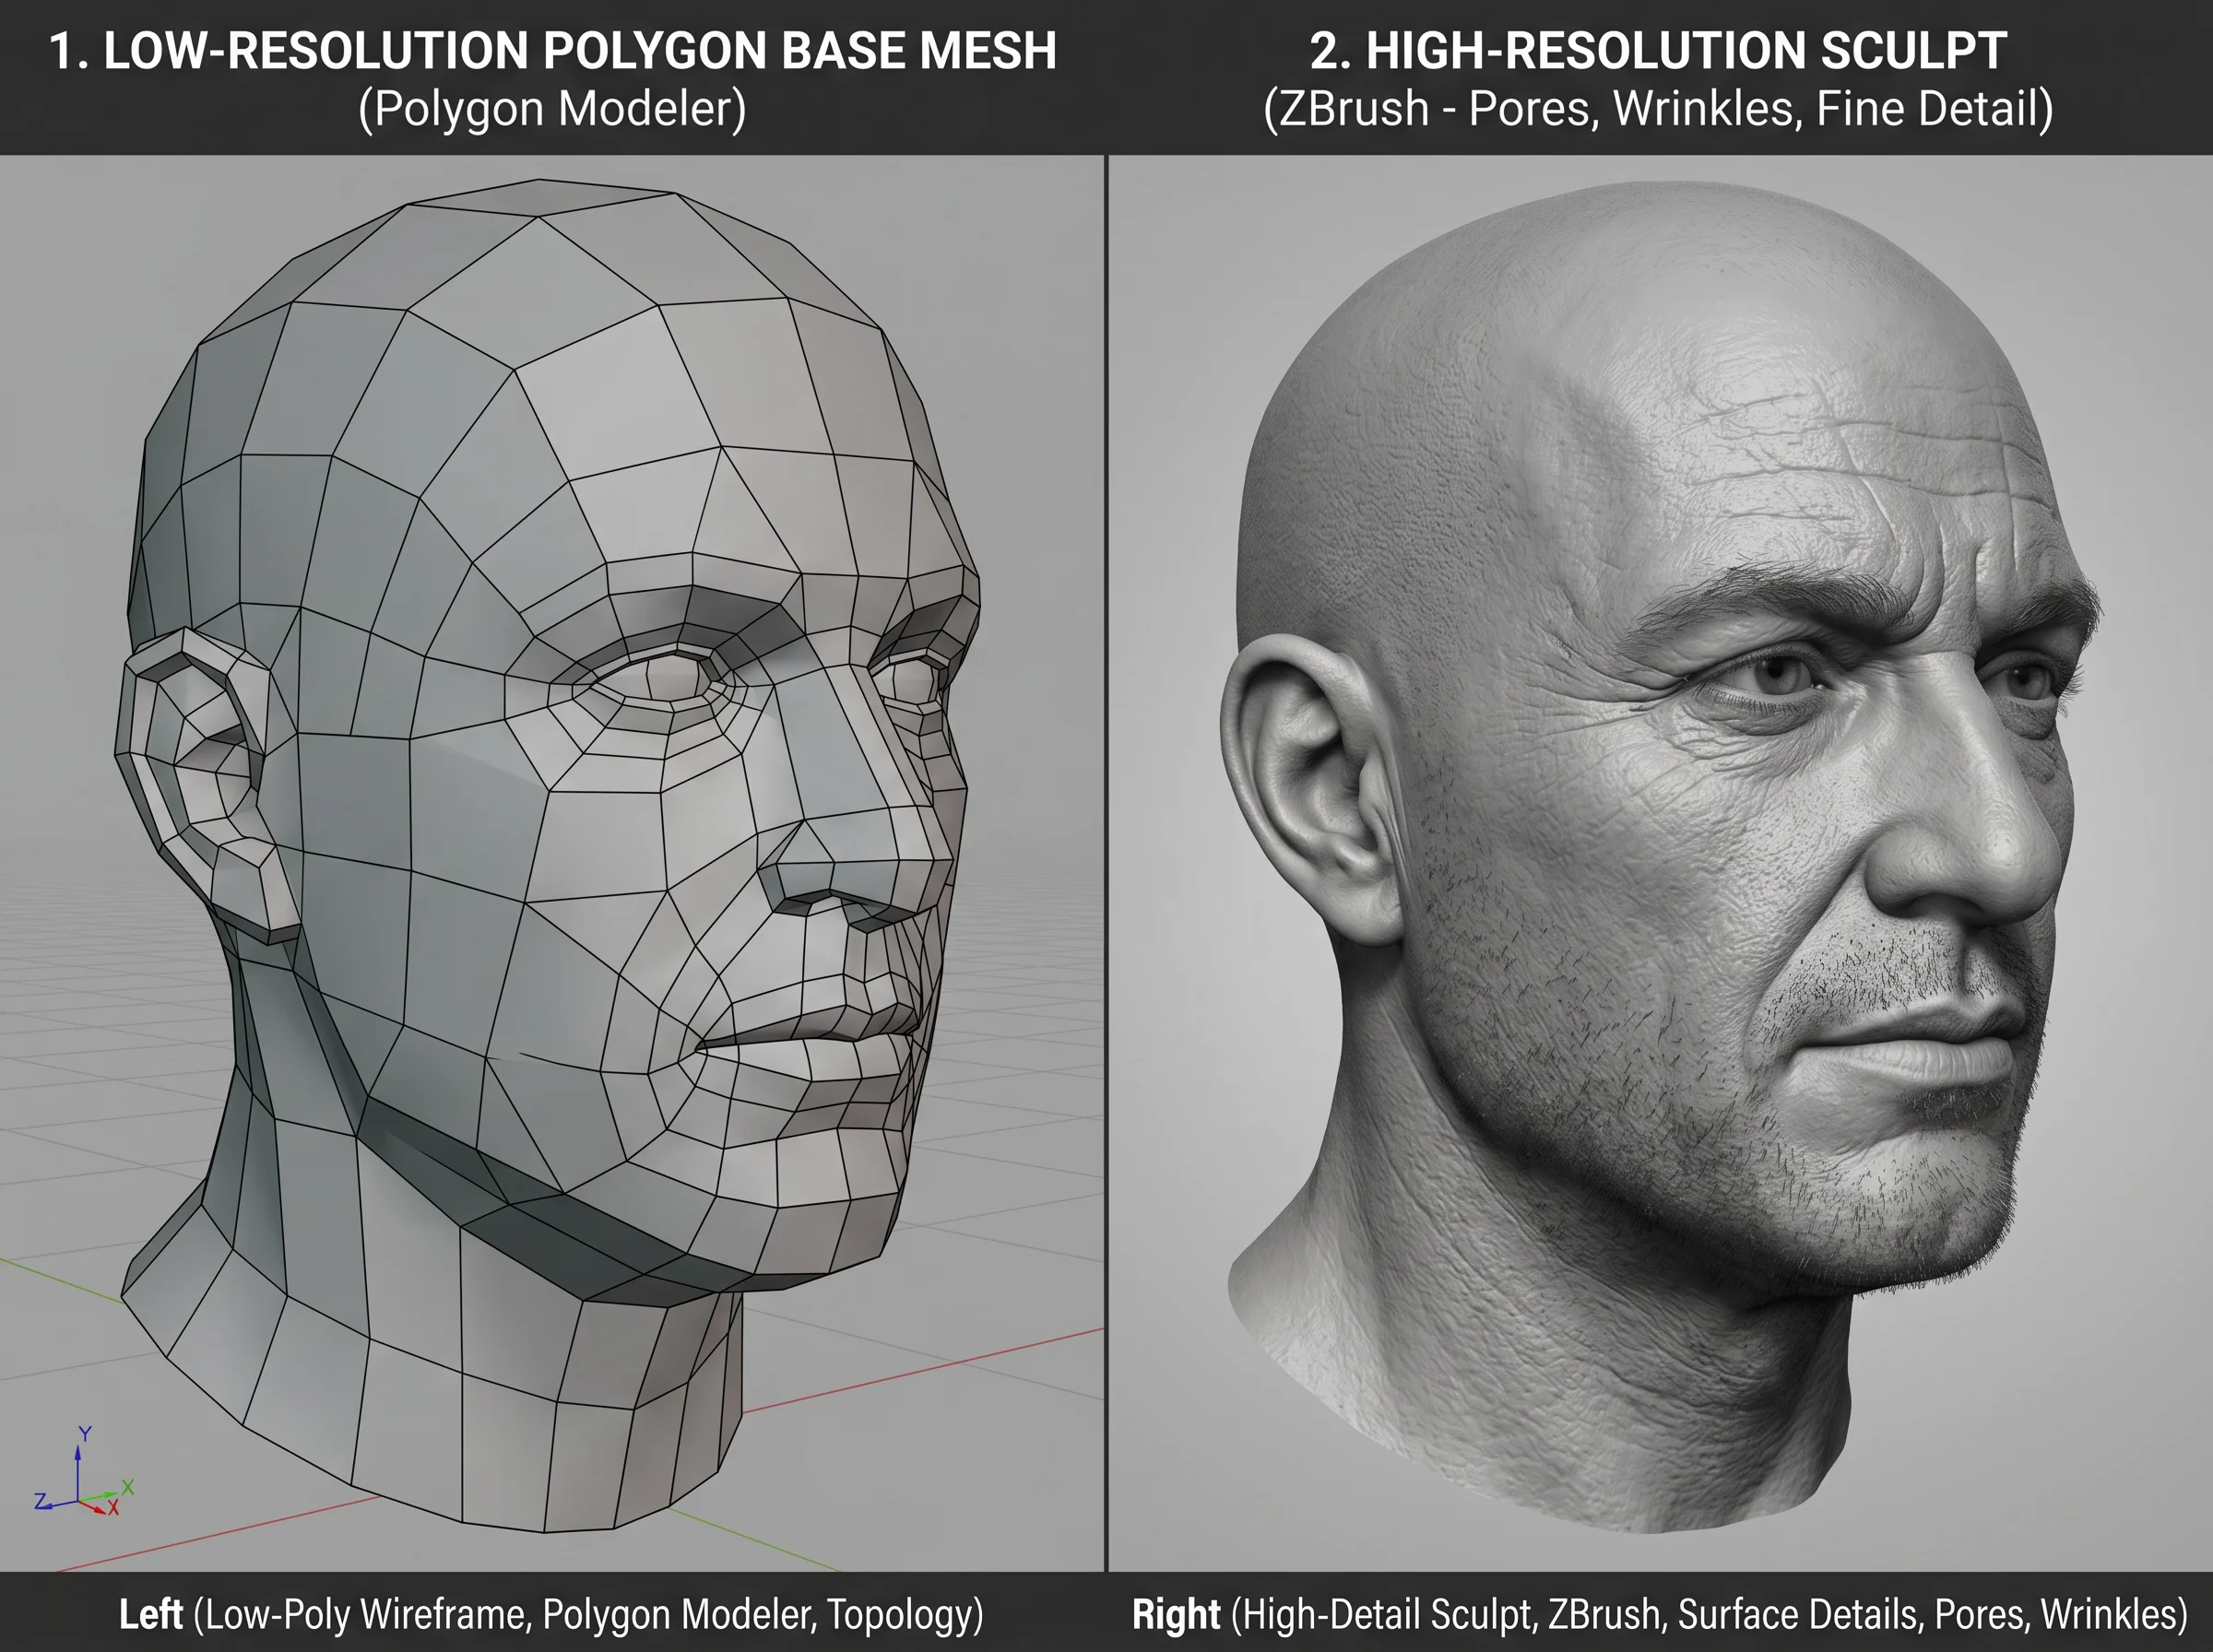
Polygon modellers like 3ds Max and Maya are excellent for hard-surface work — buildings, machinery, furniture, vehicles. They are tedious for organic forms. Sculpting a believable face by pushing individual vertices is the wrong shape of work for that toolset.
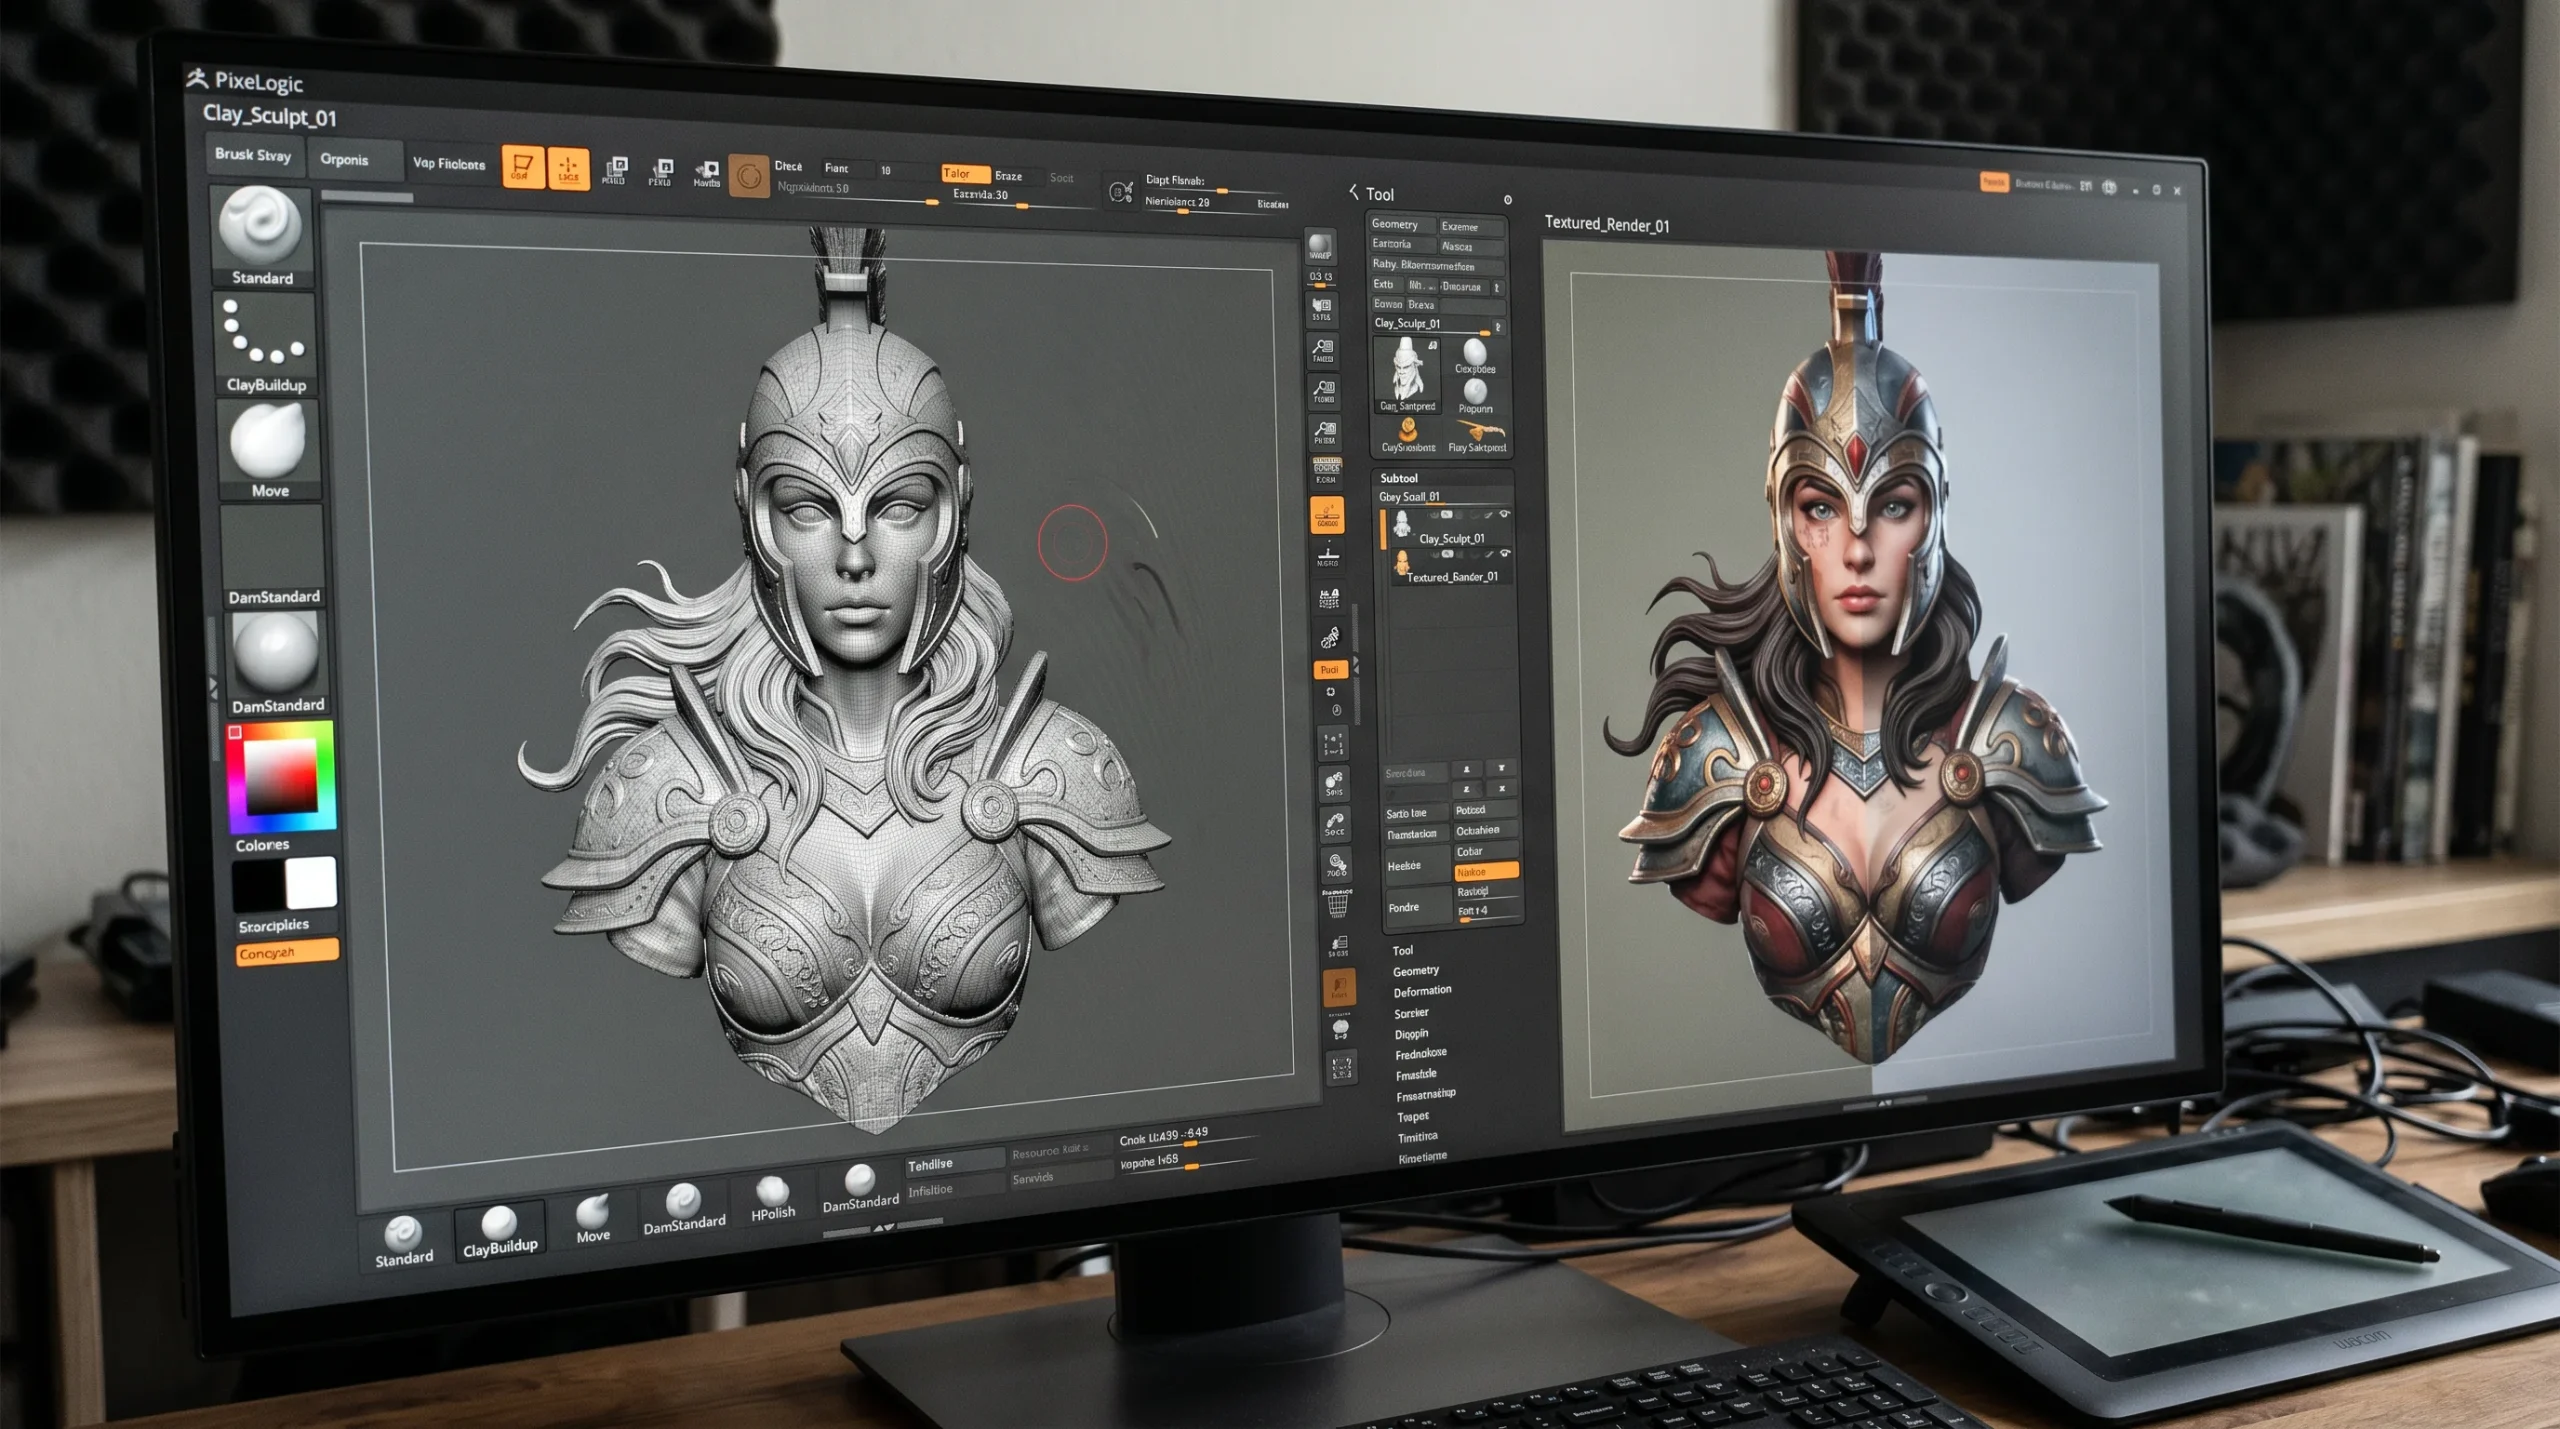
ZBrush flips the problem. Instead of pushing vertices, you push clay. Brushes add and subtract volume the way a sculptor’s thumb would. Detail is layered: rough silhouette first, secondary forms next, then pores and creases at the end. The high polygon count it handles — multi-million-poly meshes are routine — means you can keep sculpting until the surface reads correctly, then retopologise to something a renderer or game engine can actually use.
That is the whole pitch. Not magic. Just the right shape of tool for organic, anatomical, or stylised forms.
Where character work fits in our pipeline
A character rarely arrives as a single deliverable. It is usually part of something larger — an explainer animation, a product line that wants a mascot, a 3D-printed prototype, or a figure that needs to live inside a real-time experience. So the ZBrush part of the job is almost always one stage in a longer chain.
A typical pipeline on a character brief looks roughly like this:
- Concept and reference. 2D sketches, mood boards, or photography. Whatever pins down silhouette, proportions, and attitude.
- Base mesh. A rough polygonal blockout — often built in 3ds Max or Maya — that establishes proportions before any sculpting starts.
- Sculpting in ZBrush. Primary forms, secondary forms, surface detail. Polypaint passes where useful.
- Retopology and UVs. Turning the multi-million-poly sculpt into a clean topology a renderer or game engine can use.
- Texturing, rigging, rendering. Back into the main DCC stack — 3ds Max, Maya, Blender depending on the job. Substance for textures when called for.
- Output. Renders, animation, real-time asset, or a print-ready STL/OBJ.
The honest part: most of the time spent on a character job is not in ZBrush. It is in the back-and-forth on the concept, in retopology, in lookdev. ZBrush is the loud, satisfying part of the work. The unglamorous stages around it are where projects actually succeed or fail.
What ZBrush is genuinely good at
A short list of things the tool does well in practice, not in marketing copy:
- Organic surfaces. Faces, hands, fur substrate, skin, fabric folds, anything that needs to look pinched, soft, or worn.
- Hard-surface sculpting when the form is irregular. Damaged armour, weathered machinery, stone, eroded metal. Anything where perfectly straight lines would look wrong.
- Detail density. Pores, wrinkles, scars, stitching — projected onto a normal or displacement map for the low-poly version.
- Iteration without commitment. Sculpt layers let you try a stronger nose, a heavier brow, or a different jaw and dial the change in or out. Useful when feedback is still vague.
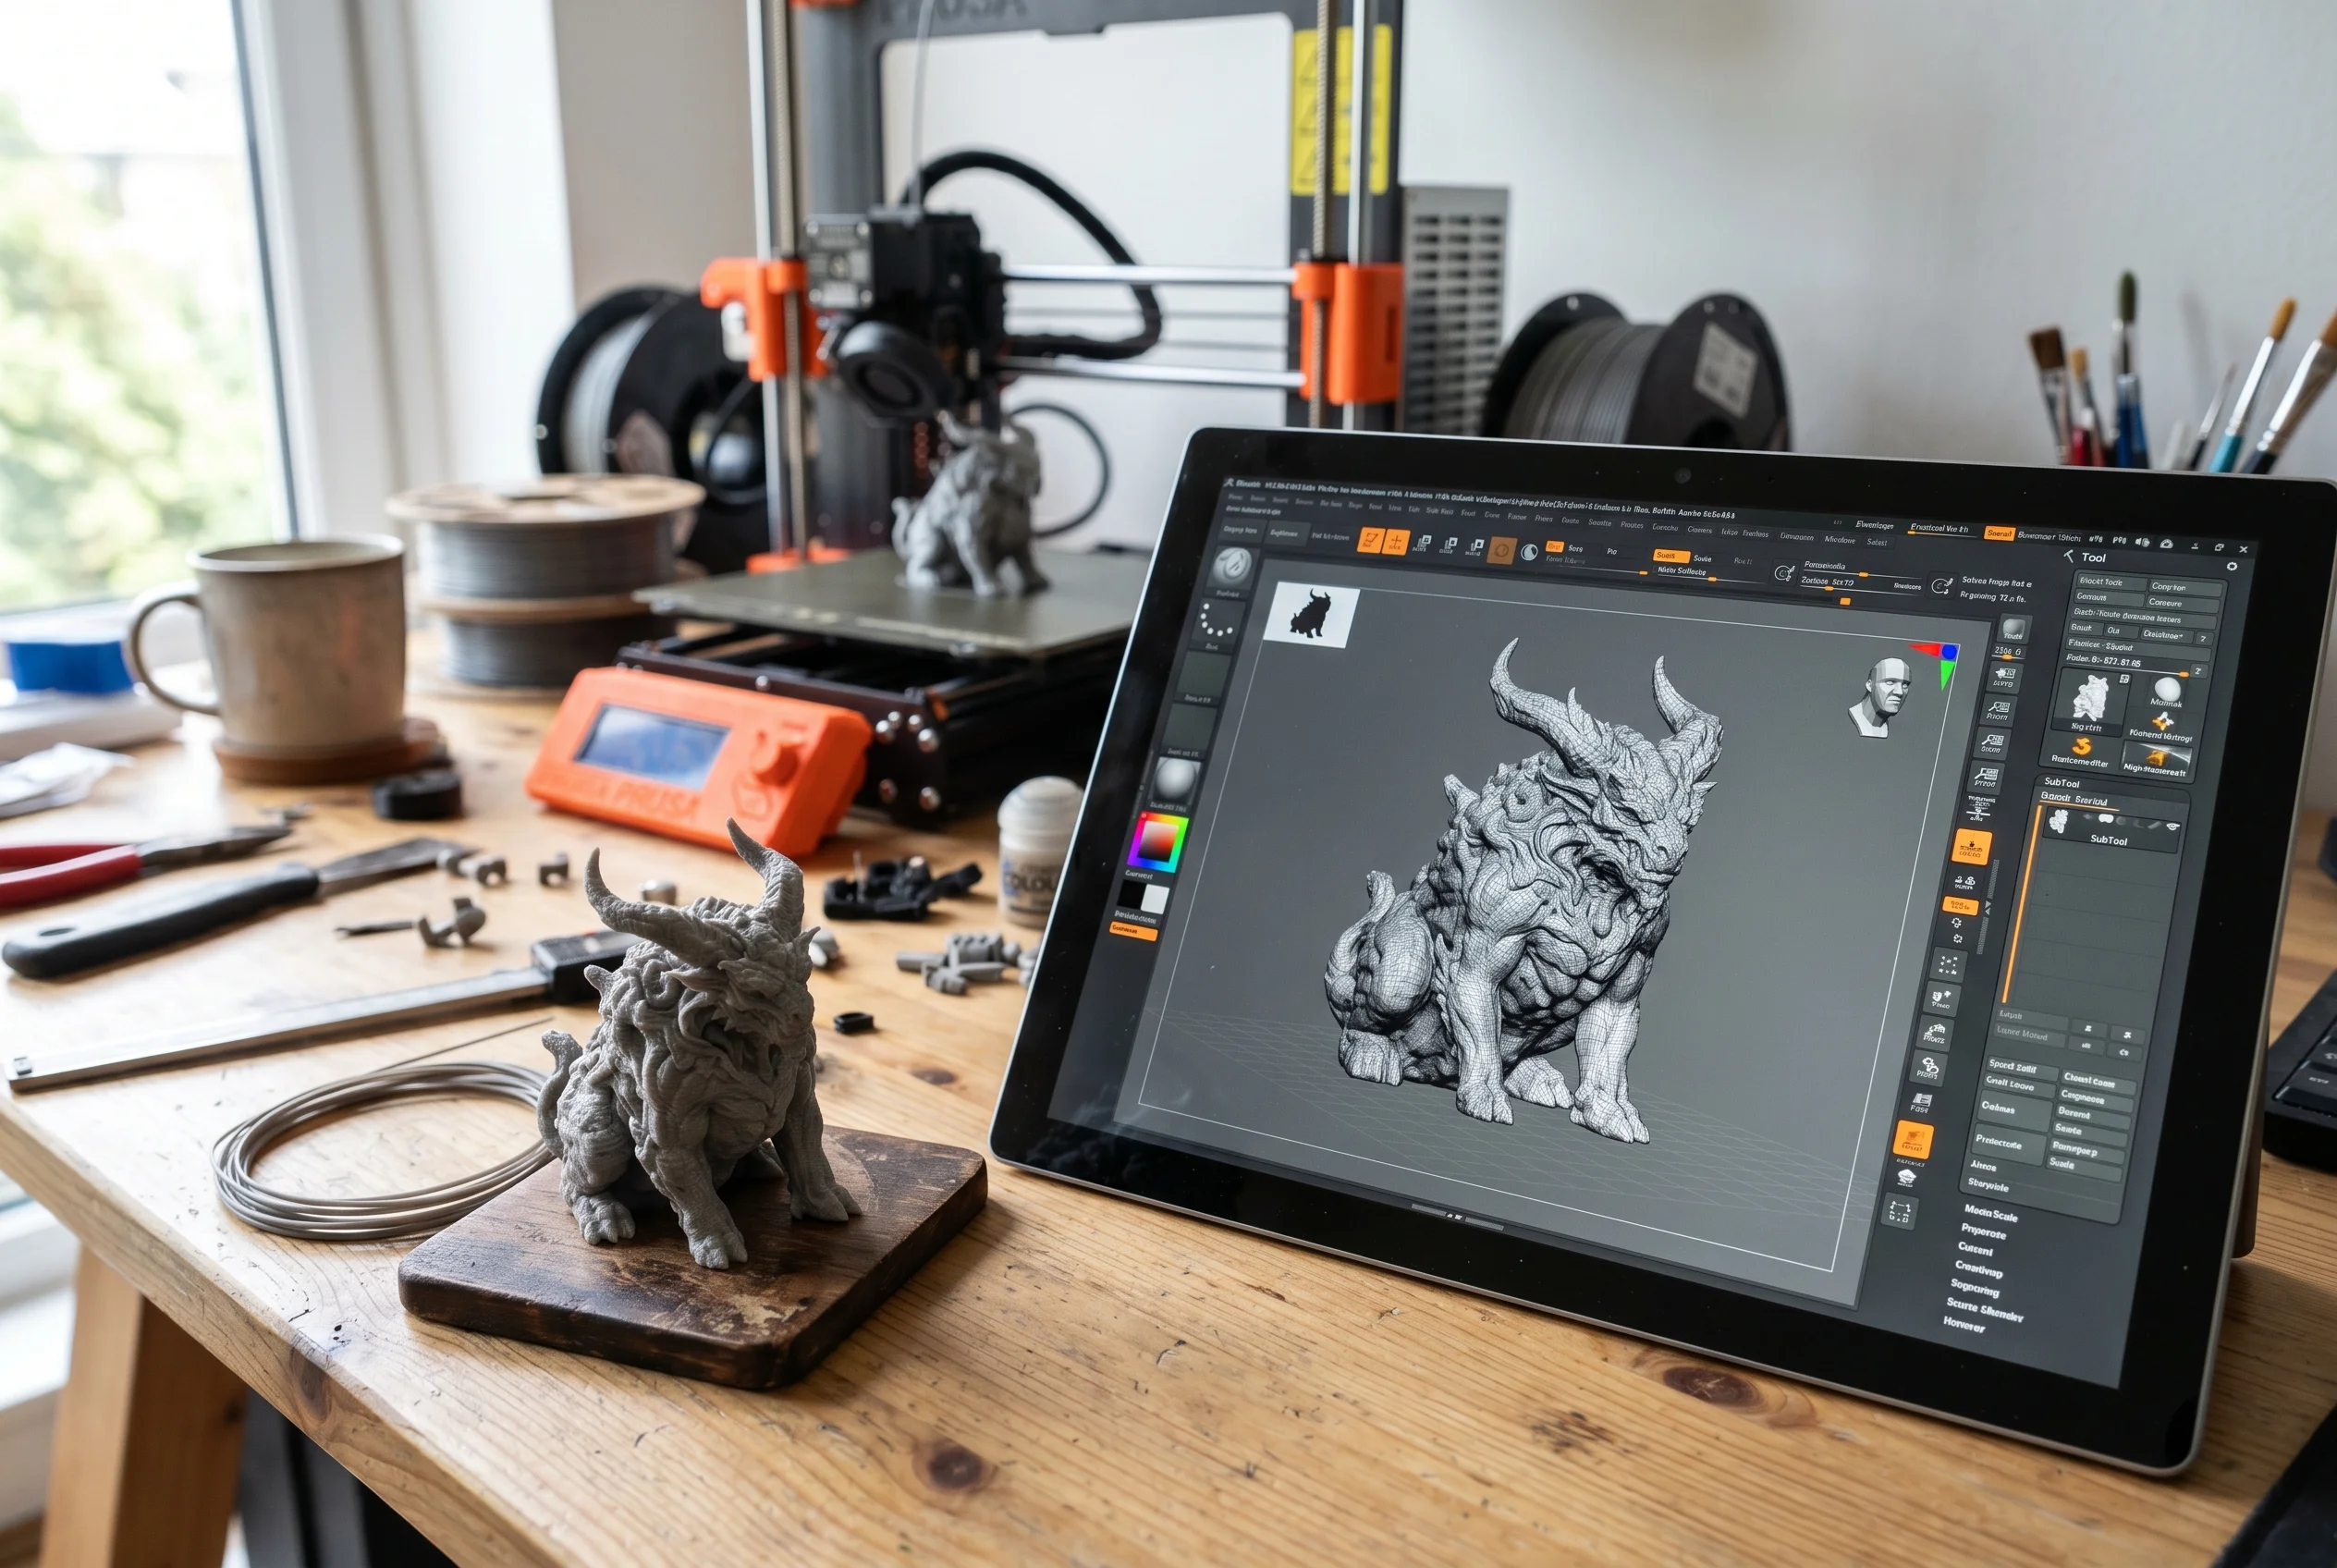
- 3D-print-ready geometry. Watertight meshes with the resolution a resin or filament printer can actually resolve — see our notes on character models for 3D printing for what that pipeline looks like.
What we don’t pretend ZBrush is for
It is a sculpting environment, not a universal 3D editor. When a brief calls for precise geometric forms — architectural walls, parametric machinery, mechanical assemblies — we work in 3ds Max, Revit, or SolidWorks depending on the context. Trying to fight ZBrush into doing parametric work is a waste of everyone’s afternoon.
It is also not where animation happens. Rigging and animation move into Maya or 3ds Max once the sculpt is finished and retopologised. ZBrush gets the character looking right. Other tools make it move.
Stylised vs photoreal — different briefs, different approaches
A stylised mascot for a product brand and a photoreal creature for a marketing piece are different jobs even though both happen partly in ZBrush.
Stylised work tends to be silhouette-driven. Big, readable shapes. Clean topology because the model often ends up in a real-time context. Surface detail is restrained — over-detailing kills the character. Decisions get made earlier, and rework is cheaper because the form is simpler.
Photoreal work is the opposite. Anatomy has to hold up under close inspection. Skin needs subsurface scattering that behaves correctly. Pores, fine hair direction, and asymmetry matter. Most of the budget goes into the last 20 percent of the sculpt, where the difference between “fine” and “convincing” lives.
Clients sometimes ask for “photoreal but cute.” That is usually a conversation, not a brief — the answer almost always lives at one end of the spectrum or the other.
How to brief a character job so it doesn’t drift
Character work goes sideways more than archviz work does. Buildings have plans and elevations. Characters have feelings, and feelings are hard to spec. A few things that make the difference between a smooth job and a long one:
- Reference, lots of it. Three photos of “the kind of face I’m imagining” beats a thousand-word description every time.
- A clear use case. Is this for print? Animation? Real-time? Each changes the topology budget and the texture approach.
- One decision-maker. Character feedback by committee is how schedules die.
- Acceptance of a blockout stage. Approving the silhouette before detail goes in saves enormous amounts of rework. Skipping that step is almost always a mistake.
For more on the full studio service offering around characters — including 2D concept, rigging, and animation — see our 3D character design service page. For background on the team and how we work, there’s the page about the studio.
The honest summary
ZBrush is the right tool for organic and sculptural modelling. It is not the whole answer to a character job — concept, retopology, texturing, rigging, and animation all live in other places — but it is the part where the character actually starts to look like itself. We use it because it is the best tool for that specific job, not because it is the only tool we know.
If you have a character brief, the question we will ask first is not “what software” but “what is this character for.” That answer drives everything else.
was acquired a couple of years ago by Pixologic, which develops a similar commercial product ZBrush. Since then, the development of Sculptris has been frozen.