“Can you make a 3D model of me?” That request lands in our inbox more often than you’d guess — sometimes from collectors, sometimes from a parent who wants a miniature of their kid in a soccer kit, sometimes from a studio building a digital double for a game cinematic. The 3D model me workflow is the same in spirit each time: take what reference exists of a real person, and translate it into clean, printable geometry. The details are where it gets interesting.
This article walks through how the work actually happens — what good reference looks like, what a modeler does on the screen, and where the common mistakes live. We’re a 3D visualization and modeling studio, not a scanning bureau, so the focus here is on the design-side modeling, not on which scanner brand to buy.
What a 3D Model Me Project Really Involves
Stripped of the marketing language, a personalized figurine project has four moving parts:
- Reference capture. Photos, a scan from a third-party booth, video frames, sometimes just selfies from a phone.
- Modeling. Either rebuilding the person from scratch (sculpt + retopology) or cleaning up a noisy scan into printable geometry.
- Color and surface work. Texture painting, polypaint, or vertex color depending on the print process.
- Print preparation. Wall thickness, drainage holes, supports, and splitting the figure into parts where it makes sense.
The mistake most first-time buyers make is thinking it’s a one-button conversion. It isn’t. A raw scan dropped into a slicer almost never prints well — eyelids fuse to cheeks, fingers merge, hair turns into one solid lump. Somebody has to sit at the screen and fix that. That’s the job.
Reference: What to Send a Modeler
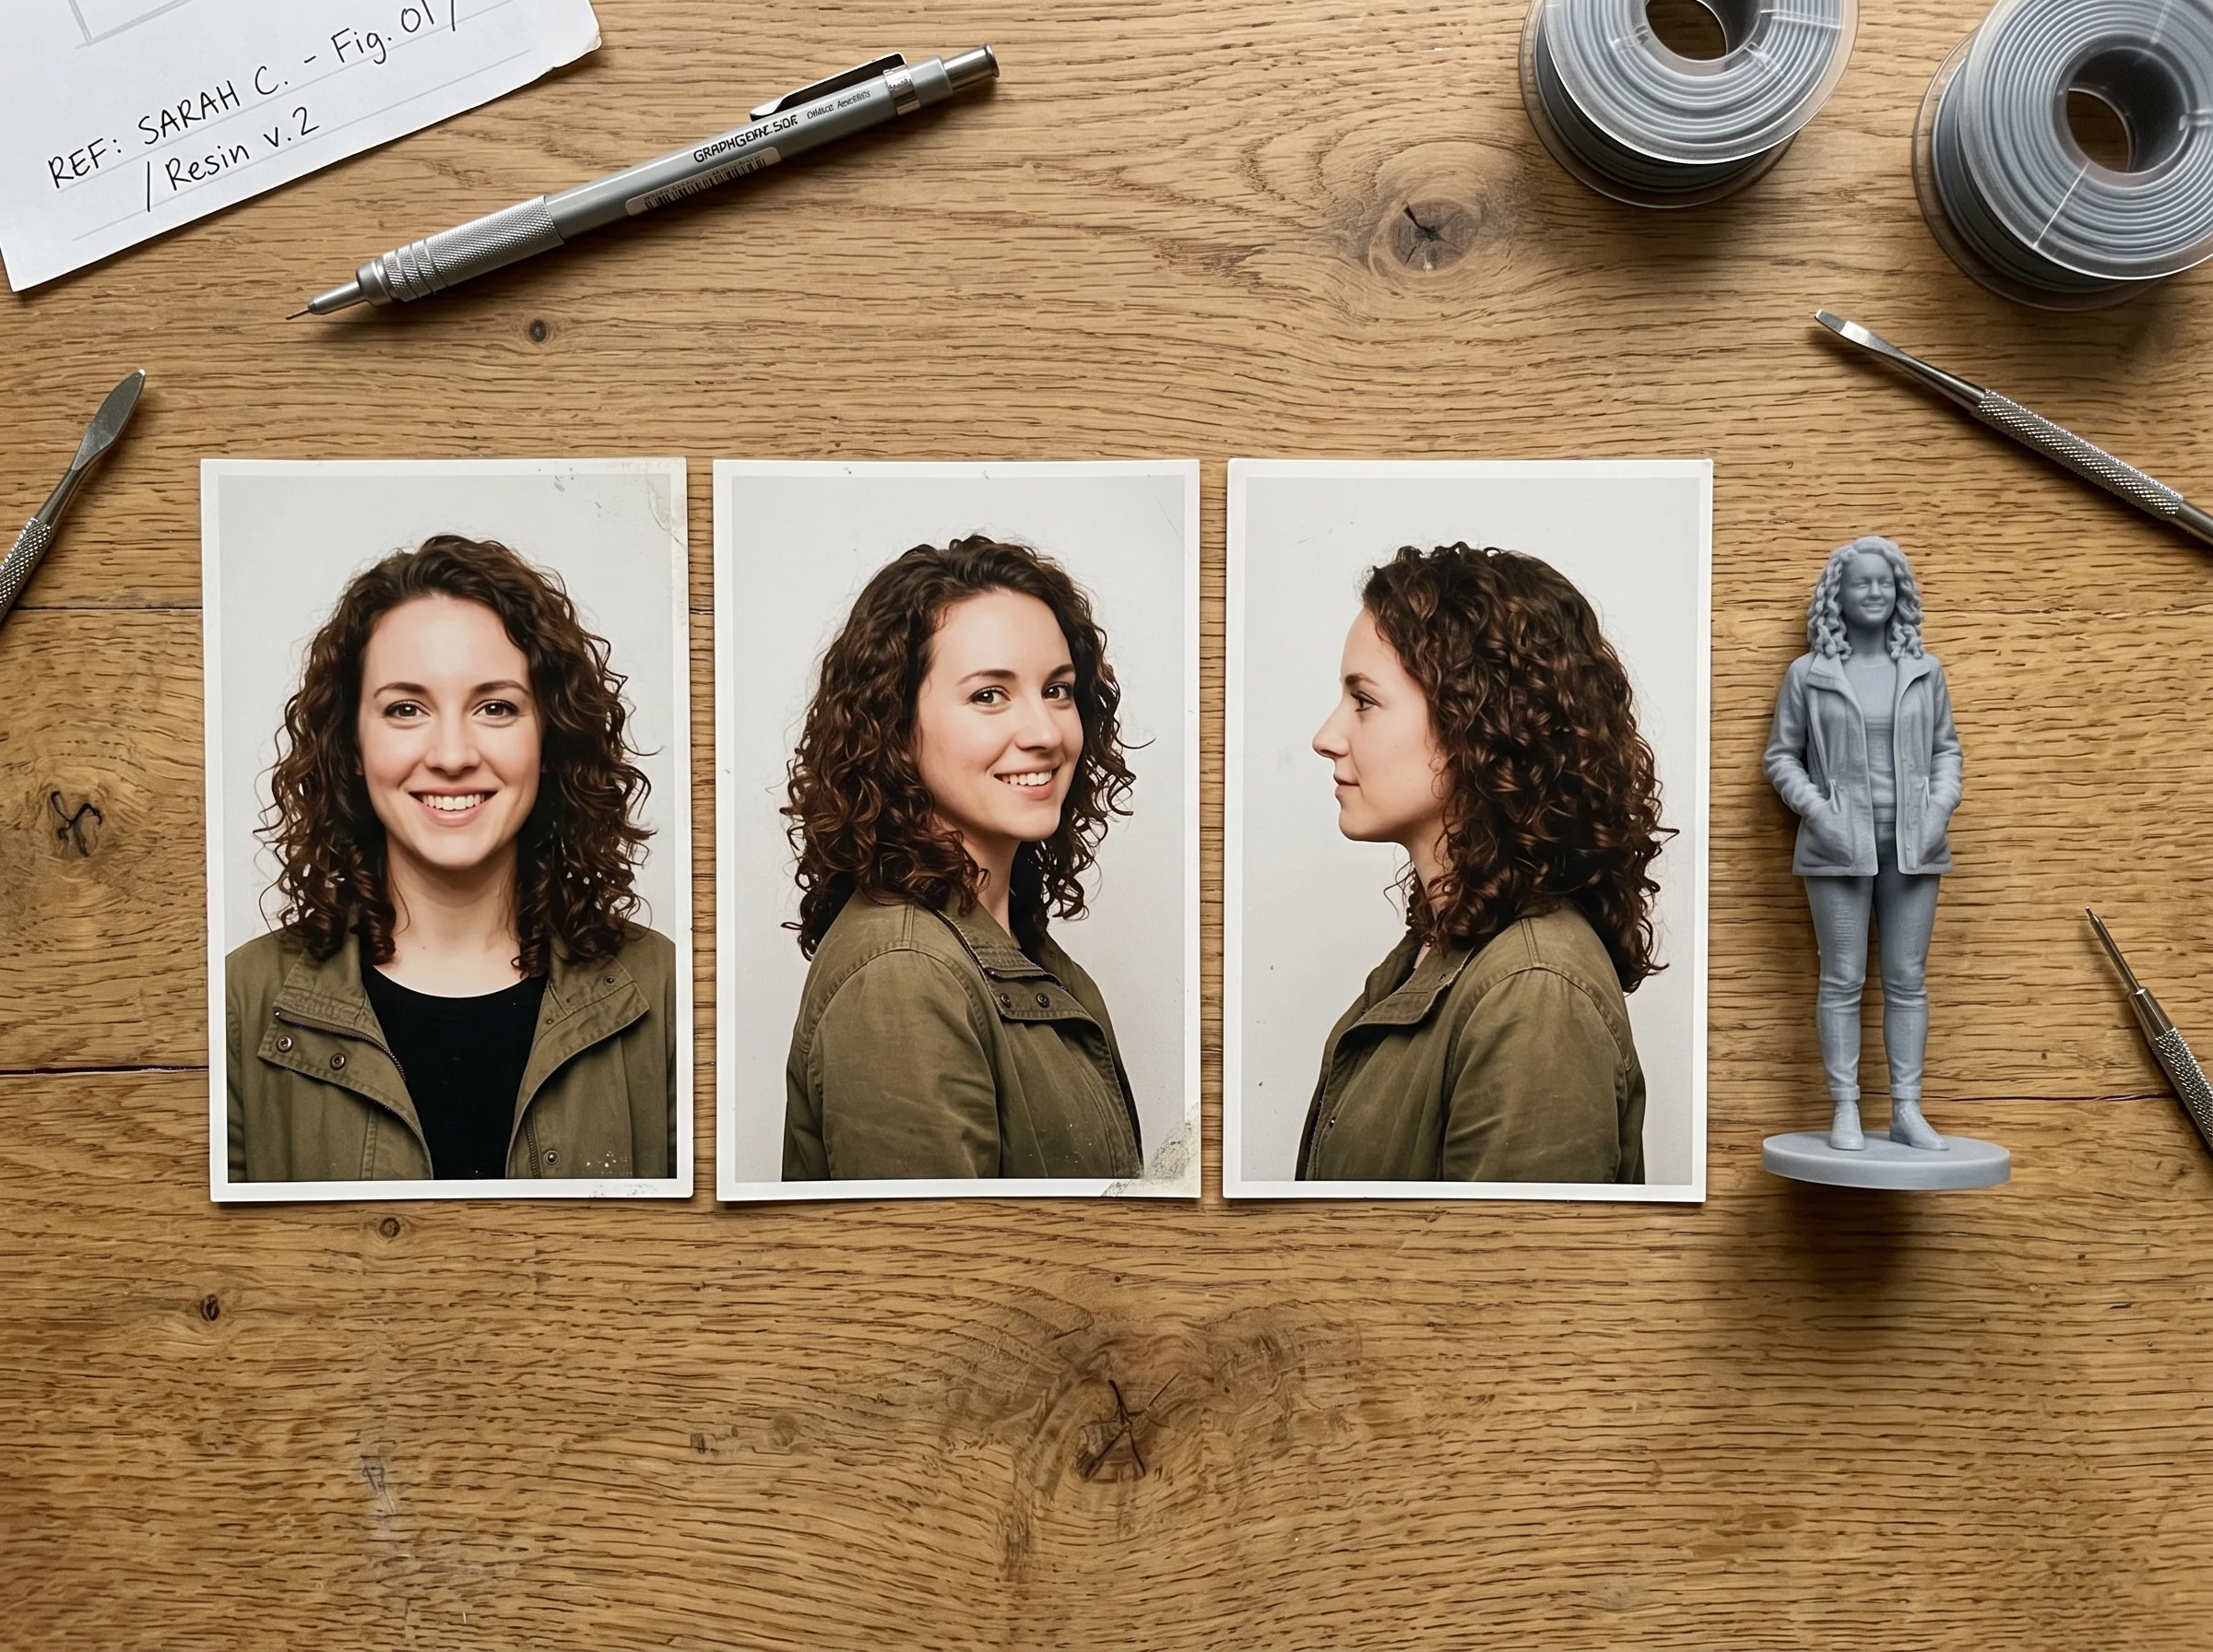
If you want a 3D portrait model that actually looks like the person, the reference matters more than the software. We’ve seen great results from a phone-camera shoot done correctly, and unusable results from an expensive scan done badly.
Photos
For a head-and-shoulders or full-figure model, the ideal photo set is:
- Even, diffused lighting — overcast daylight is your friend.
- Front, three-quarter (both sides), and profile views at a minimum.
- Neutral expression, mouth closed, eyes open.
- Hair tied back if it’s long — flowing hair is genuinely hard to model from photos.
- Solid, non-reflective clothing. Skip the chiffon and shiny silk.
Twenty good photos beat two hundred bad ones. Blurry phone shots in a dim hallway will not turn into a sharp figurine, no matter how clever the modeler is.
Scan data
If you already have a scan — booth capture, photogrammetry, depth-sensor output — send it as it came off the device. Don’t pre-decimate or pre-clean it. The modeler wants to see the raw mesh and the texture maps, including the messy bits. The “messy bits” often hold the only information that distinguishes one person from another.
Video
A short, slow 360-degree walkaround on video is a surprisingly good supplement. It gives a modeler something to check against when the still photos disagree about, say, ear shape.
Modeling the Person
Once the reference is in, the modeling work splits into two broad paths.
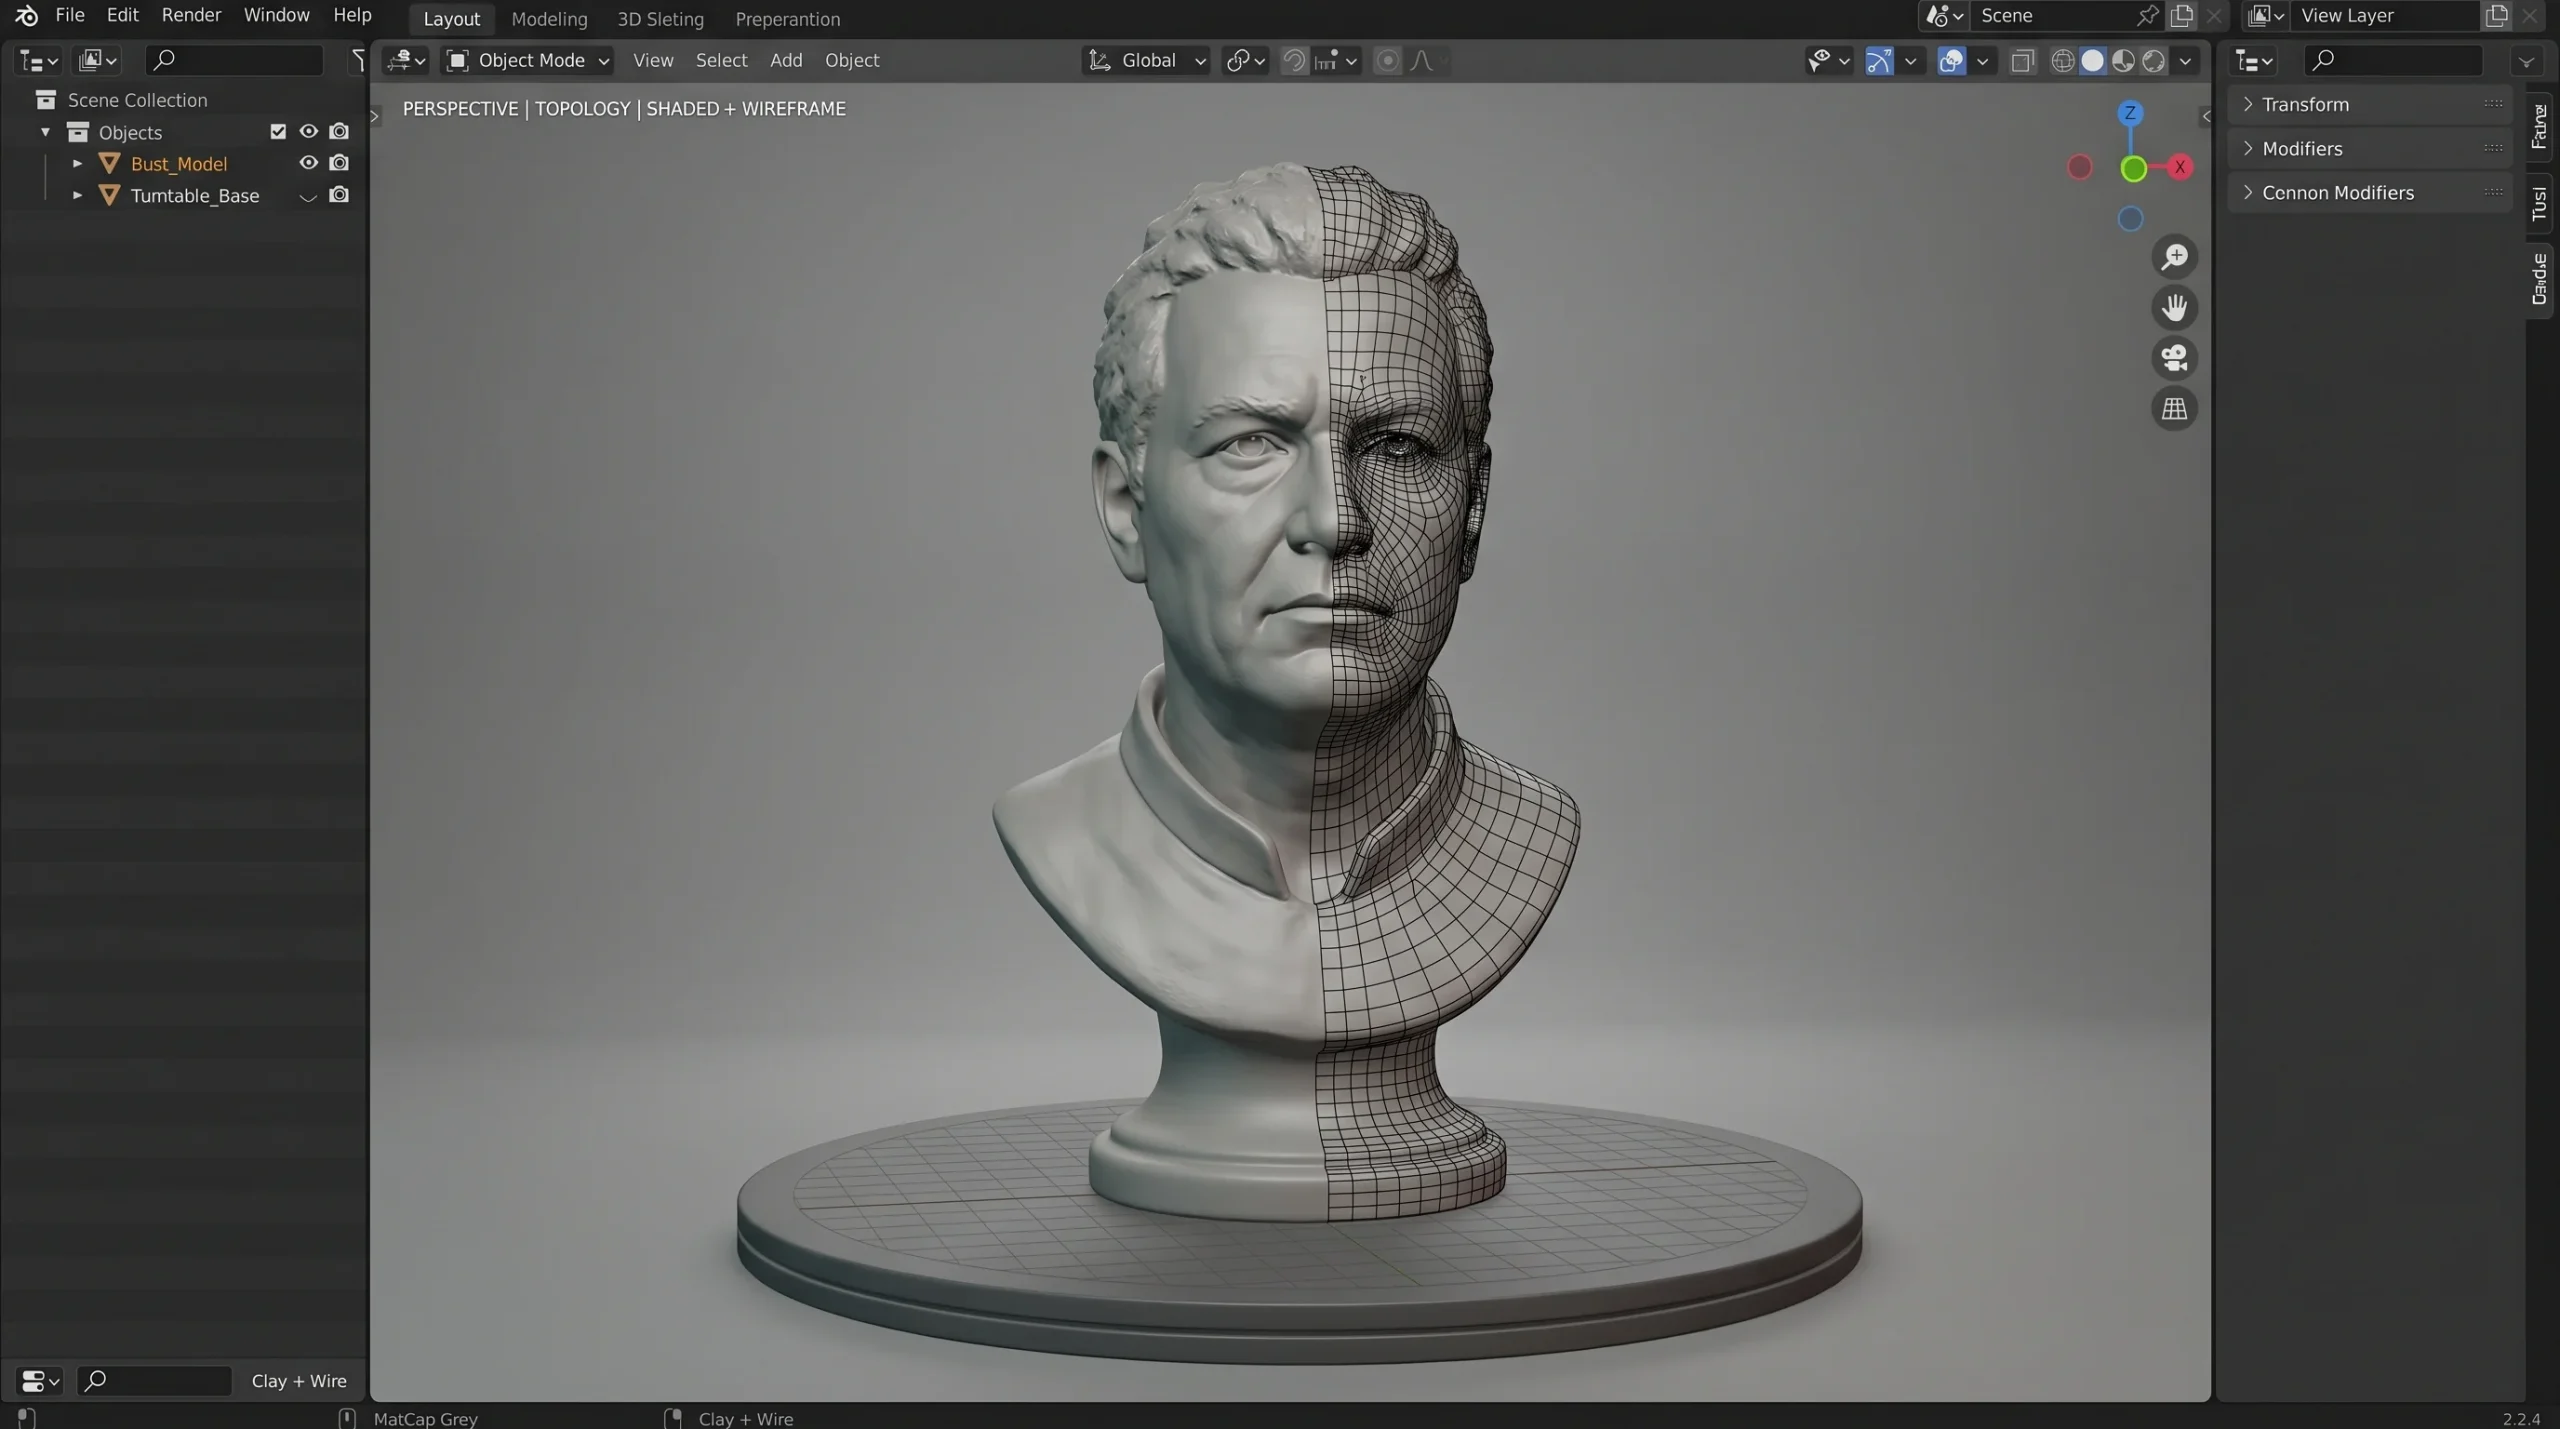
From-scratch sculpting is what we use when the reference is photo-only or when the project is stylized — a caricature, a cartoon version, a game-ready hero. The modeler builds a base mesh and pushes the proportions in ZBrush or Blender until the silhouette matches the person. Then surface detail goes in. Then retopology turns the dense sculpt into clean, printable geometry.
Scan cleanup is the path when the client already has scan data and wants a realistic likeness. The mesh comes in dense and ugly. Holes get filled. Floating noise gets deleted. Topology gets rebuilt so the print isn’t trying to slice a million-poly tangle. Eyes, ears, hair, and any clothing detail get manually rebuilt — because scans always lose those.
Half the value of either workflow is that nobody outside the modeling team can see the difference between a scan-based model and a from-scratch sculpt, once both are printed. The decision is about what reference you have, not about which method is “better.”
Color, Texture, and What the Print Process Wants
Where the figure ends up — full-color sandstone print, single-color SLA resin, FDM plastic — drives how the surface gets prepared.
- Full-color sandstone (binder-jetted gypsum): the model needs UV-mapped textures or polypaint baked to vertex color. Skin tone, clothing color, hair color all come from the texture.
- Resin (SLA/DLP): color is the printer’s, not the model’s. The modeling job is to push detail — pores, fabric weave, embroidery — so it survives at miniature scale.
- FDM: larger, chunkier geometry. Layer lines are real. Fine facial detail tends to be lost, so the sculpt should over-emphasize edges.
This is the part beginners skip. A figure modeled with no thought to the print process can look great in the viewport and arrive looking nothing like the preview. The print pipeline has to be in the modeler’s head from the start.
Preparing for Print
Before the file leaves the studio, a few things have to be checked:
- Watertight, manifold geometry — no holes, no flipped normals.
- Minimum wall thickness for the chosen material — too thin and the print snaps; too thick and you waste material and money.
- Drainage holes for hollow resin prints so uncured resin can escape.
- Sensible part-splitting for figures with thin arms held away from the body, swords, props, or extended hair.
- A base or stand if the figure can’t reliably stand on its own feet.
None of this is glamorous. All of it is the difference between a figure that arrives in one piece and a figure that arrives as expensive shrapnel.
Where Personalized 3D Figurines Are Used
The end uses span more ground than people expect:
- Wedding cake toppers, birthday gifts, retirement keepsakes.
- Sports trophies — youth leagues commissioning figures of every player.
- Character models for games and short films, when a real performer is the basis.
- Pet figurines — yes, including the family dog.
- Memorial pieces — and these require particular care and patience.
- Custom action figures from existing photo references of fictional or real subjects.
The technical workflow is roughly the same across all of them. What changes is the tone of the conversation with the client and how willing the modeler is to nudge the result toward “flattering” instead of “exact.”
Where a Studio Like Ours Fits In
We don’t run a scanning booth, and we don’t operate the printers. We sit in the middle: you bring the reference — photos, a scan file, video, whatever you have — and we deliver the printable model. Sometimes the client prints it themselves; sometimes they hand the file to a service bureau; sometimes we hand off a file that goes into a larger project entirely.
This kind of work sits in our 3D modeling for 3D printing service area, which is a secondary offering alongside our core architectural and product visualization work. If you’re researching the broader topic of 3D printing character models — game characters, collectibles, figurines from existing IP — that piece covers more of the character-design end of things.
A note worth making: we do design-side modeling, not engineering-grade industrial part design. A bust, a figurine, a personalized character — yes. A precision mechanical assembly with stamped tolerances — no.