“Workflow” is one of those words studios use to sell process, but most clients only care about it for one reason: they want to know how long their project takes and where decisions get made. So this page is an honest walkthrough of how a project actually runs through Art Land Design — from the first reply to your brief through to the final hand-off — and where you, as the client, are involved at each step.
None of this is unique to us. Most serious visualization studios run a variant of the same pipeline. What we try to do well is keep it predictable: clear stages, clear sign-off points, no surprises in scope or cost.
Stage 1 — Brief, scope, and the conversation that decides if we’re a fit
Every project starts with a brief. The brief can be anything from a Revit set with a rendered moodboard to a paragraph in an email plus a Pinterest link. Both work; both produce different conversations. We read what’s there, then come back with what we’d need to actually quote — usually a short list: plans, elevations, materials direction, the number of camera angles, the deliverable format, and any deadline that’s not negotiable.
The honest part of this stage is that we sometimes redirect. A client asking for one hero exterior render at the speed and budget of a quick draft is a different kind of project than the same client asking for a full marketing set. We try to surface that difference before you’ve committed to anything. If we’re not the right studio for the brief — too small, too big, wrong specialism — we say so.
Stage 2 — Modeling and lookdev
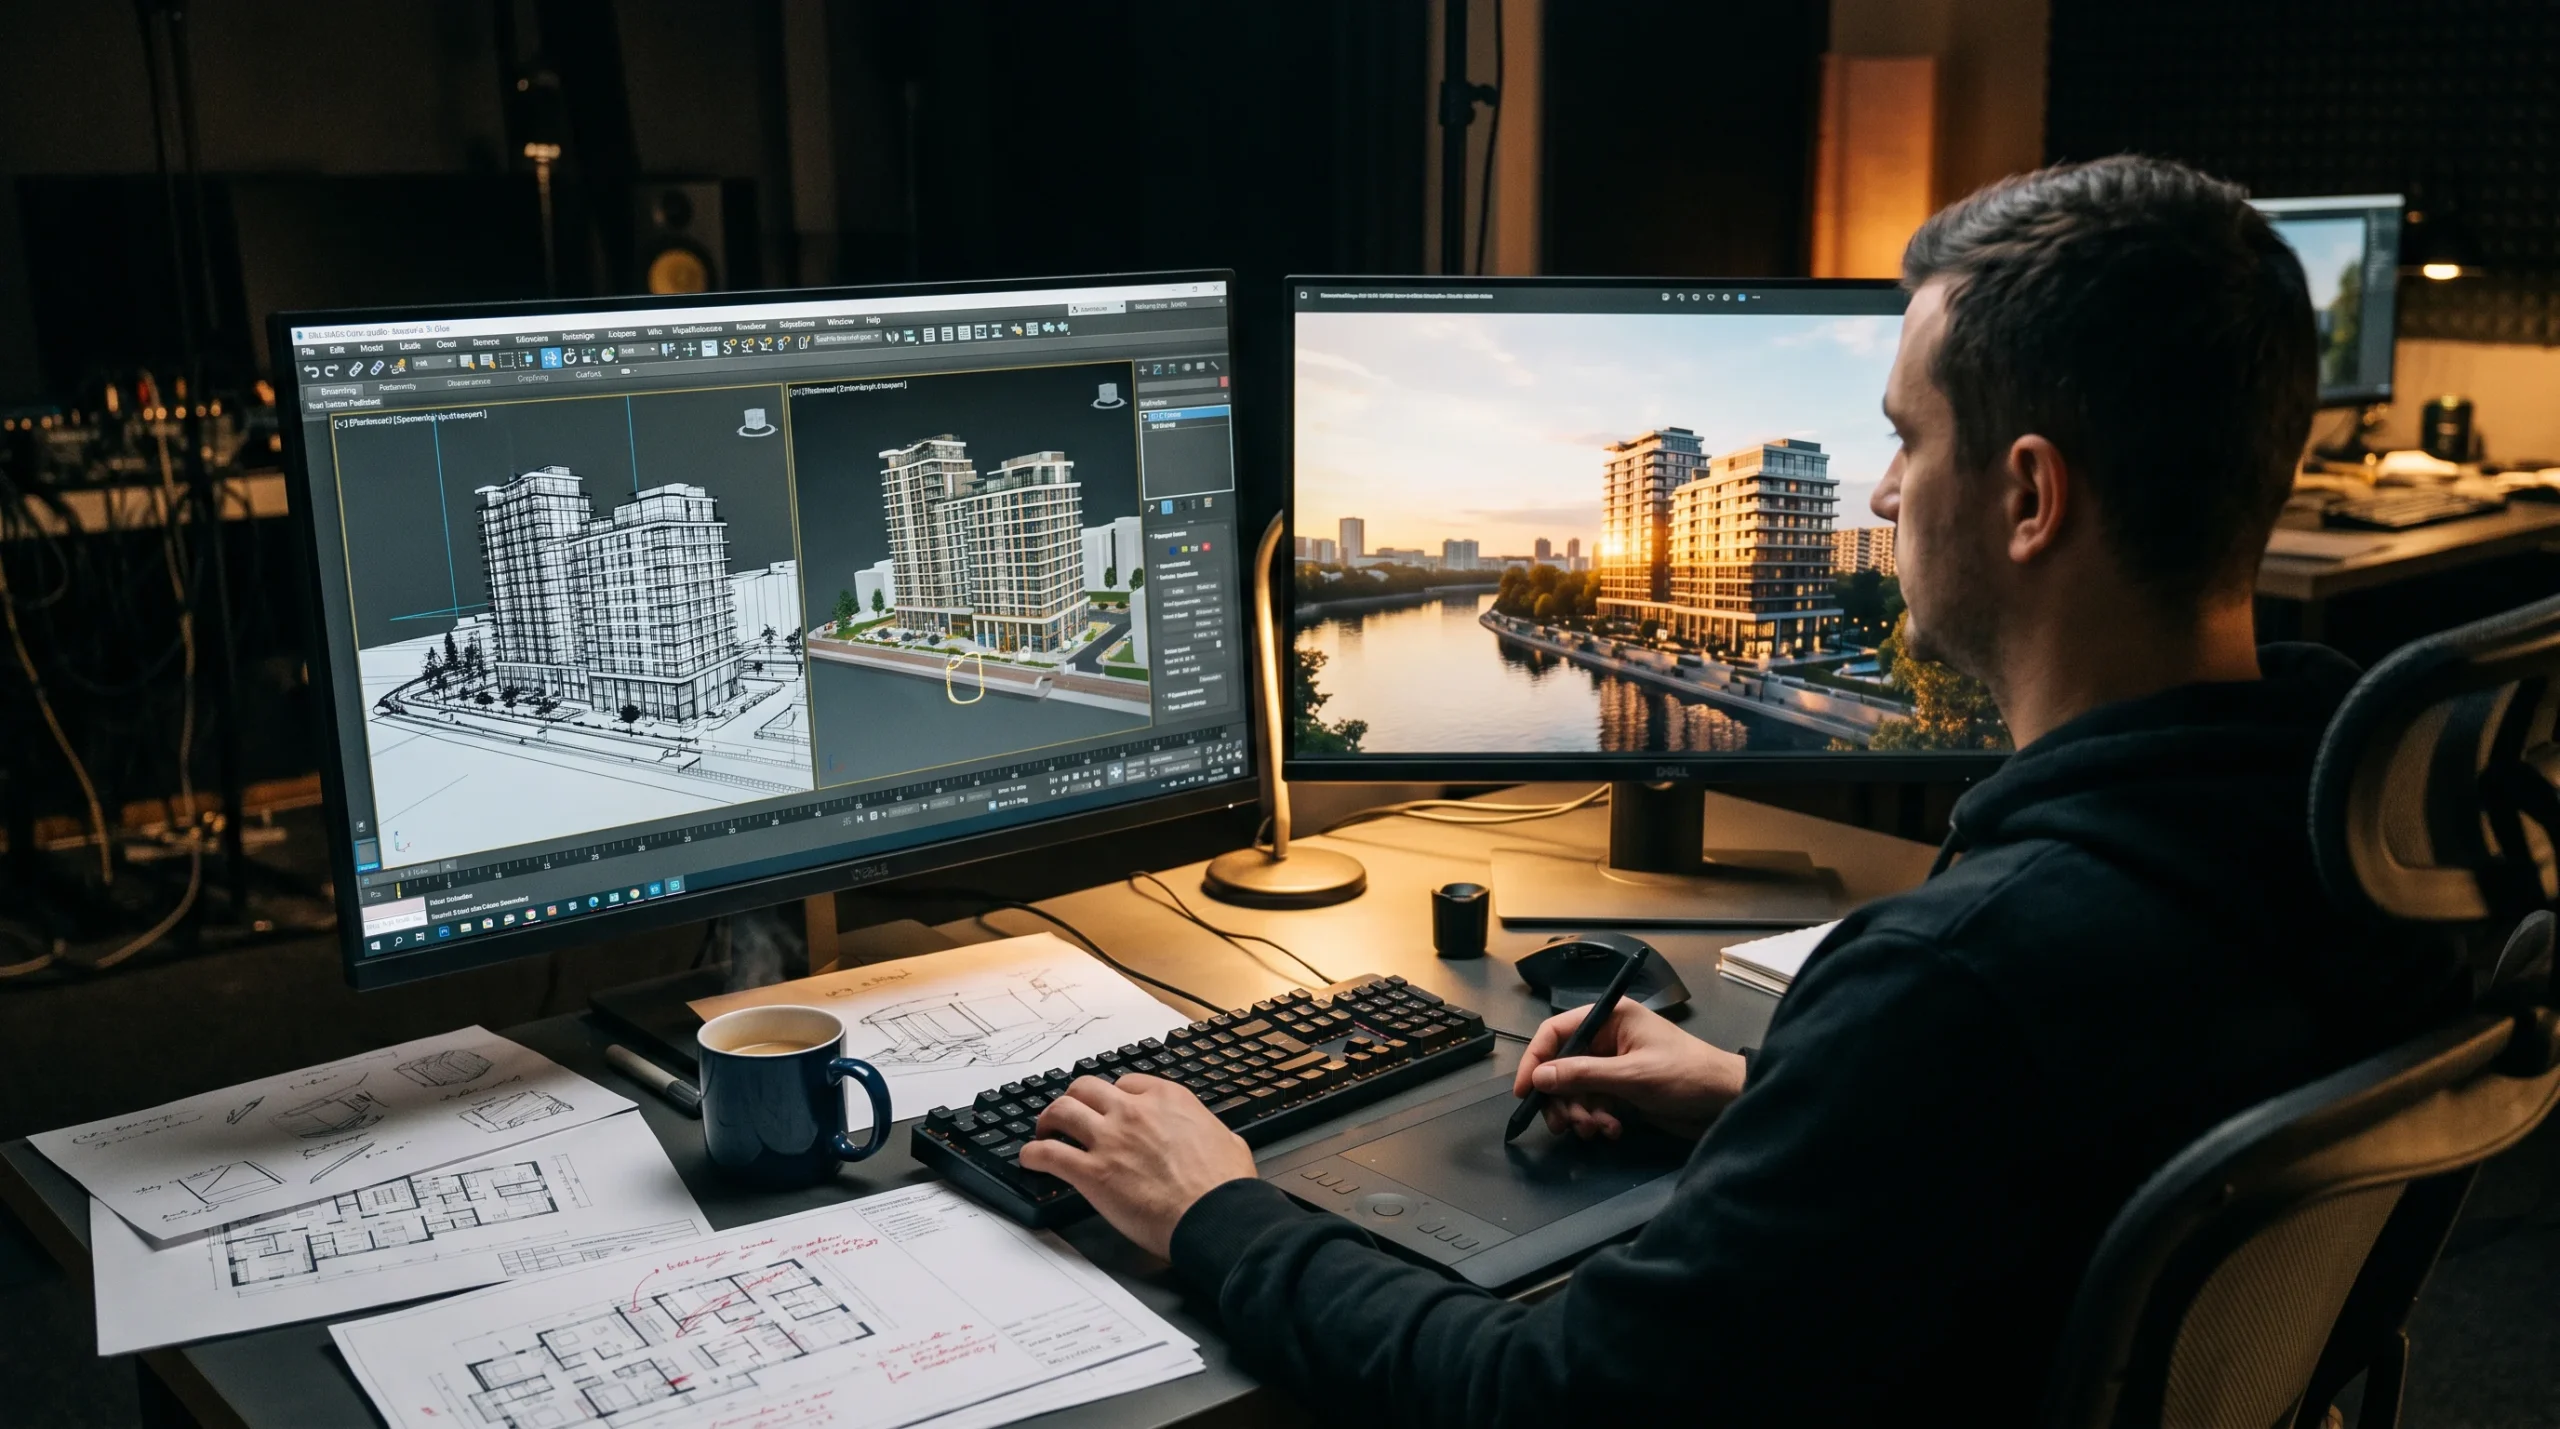
Once the project is greenlit, we move into modeling. For architectural work this means building the 3ds Max model from your CAD or BIM set. For product work it means turning a STEP or CAD file into a clean polygonal mesh — cleaning topology, fixing seams, making the geometry friendly to texturing and lighting. This is the unglamorous stage where most of the production hours actually go.
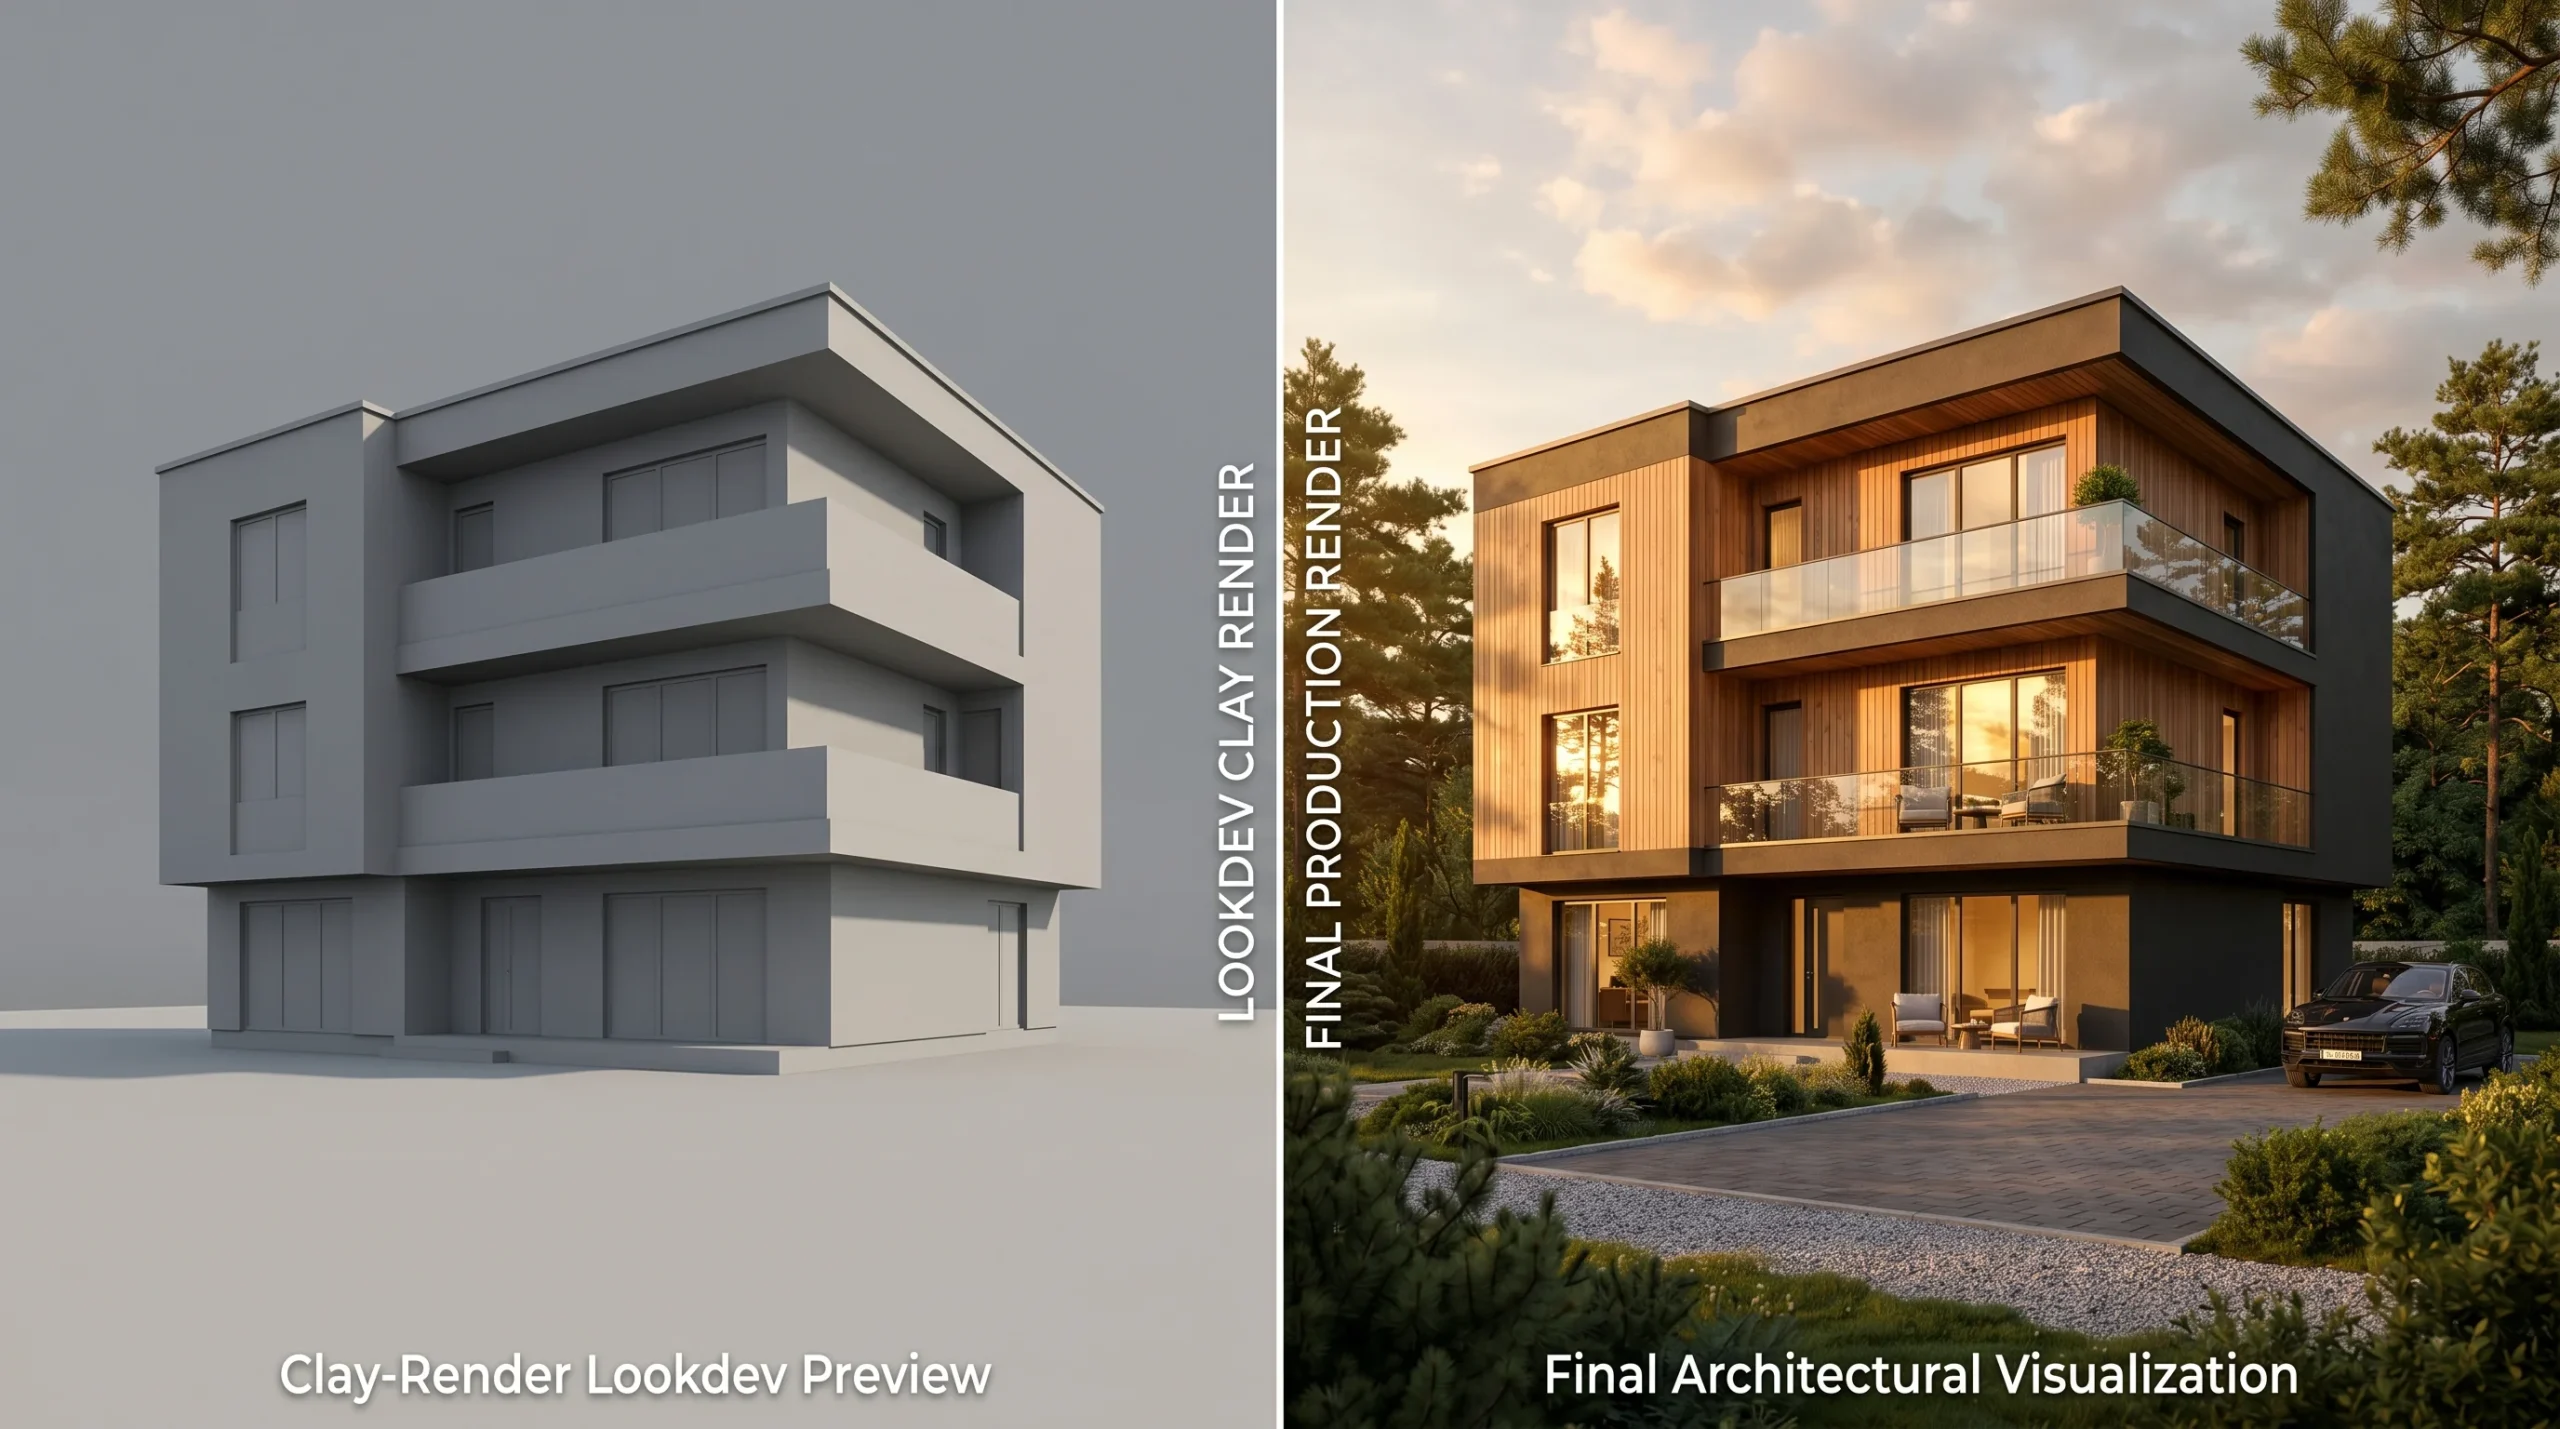
In parallel we set up lookdev — a lighting and materials test that previews how the final scene will look without committing to the final shot list. We send this to you as a low-resolution clay-render preview, sometimes a single image, sometimes a small animation. The point is to lock the lighting direction and material decisions before anything expensive gets rendered.
Stage 3 — Camera, composition, and the shot list
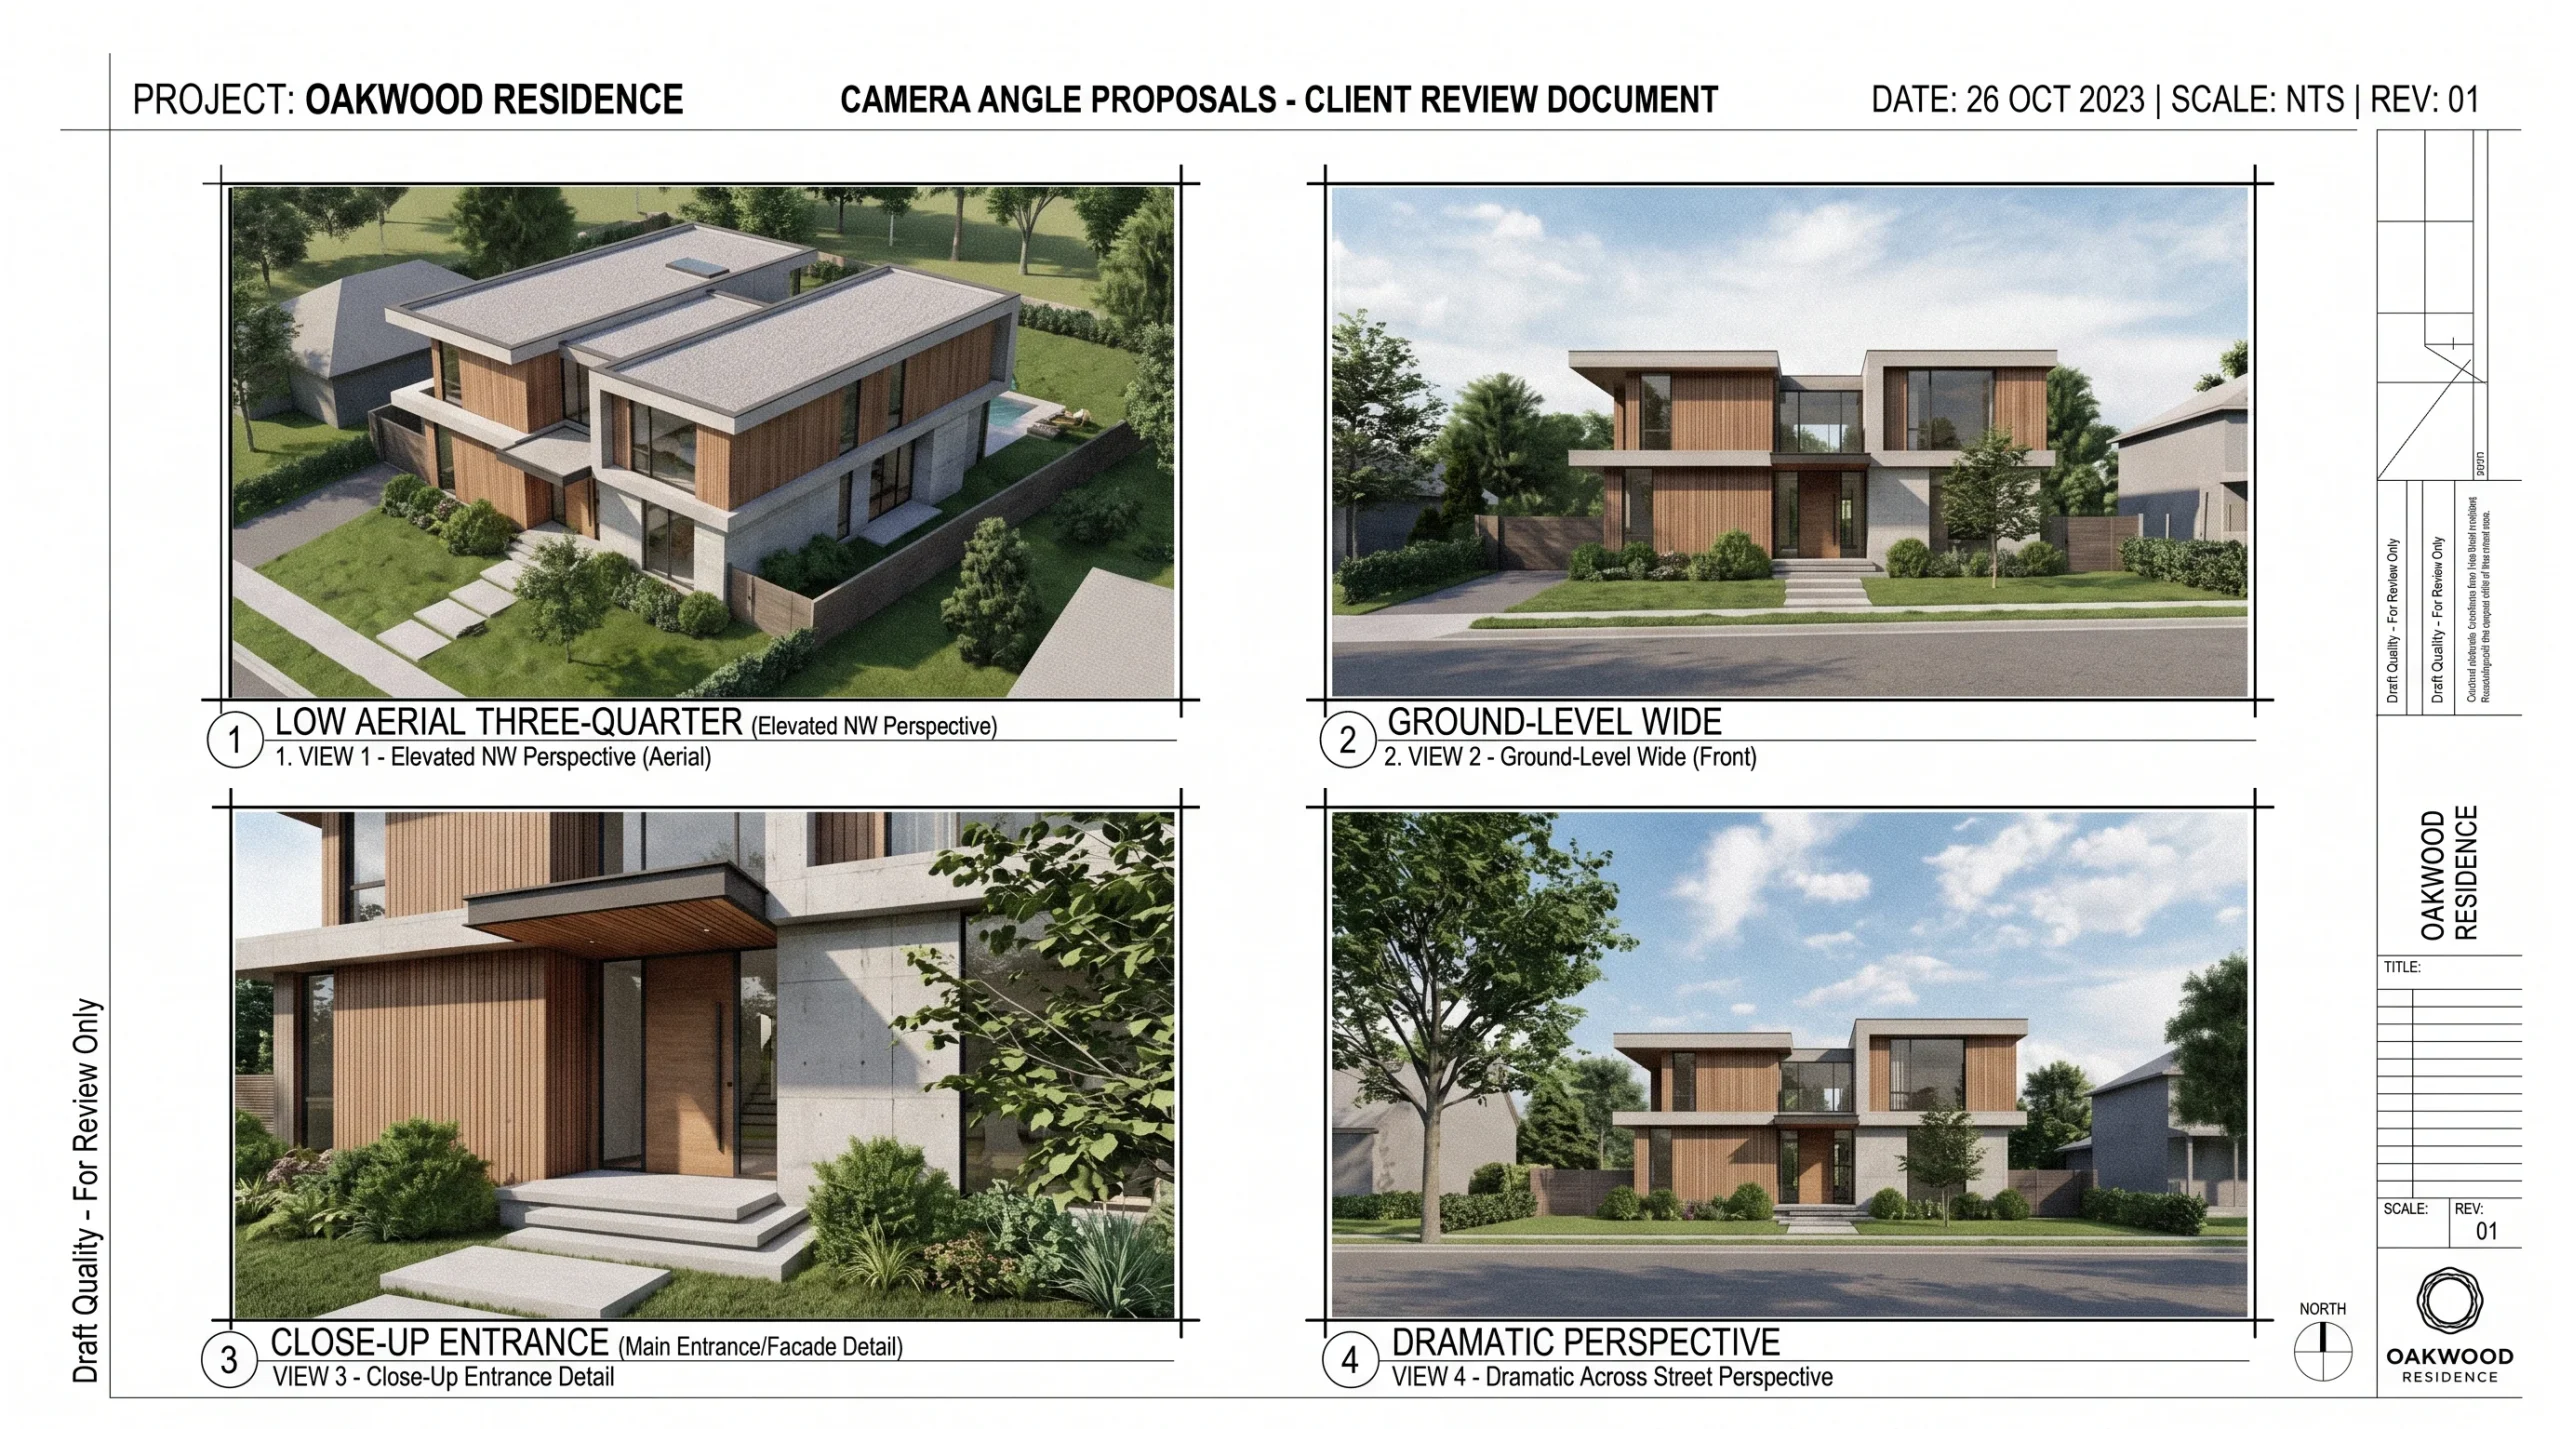
Even if a project is “just one render,” the camera angle decides whether the image works or doesn’t. We propose camera positions early — usually as a contact sheet of 4–8 low-res framings — and you pick the one (or two) you want to push to final. For animations this stage is bigger: we storyboard the shot sequence, agree on length, lock the camera path.
This is the most concentrated decision-making stage from your side. Everything downstream gets harder to change once you sign off on a camera, so we ask for explicit approval before moving forward.
Stage 4 — Production: final renders or animation
Now the expensive part runs. For stills, the final-resolution render typically takes a few hours of compute per image, sometimes longer if there’s heavy global illumination or volumetrics. For animation, it’s render-farm work measured in days, not hours. We post-process each frame in Photoshop or After Effects — colour correction, atmosphere, small fixes — before delivery.
You don’t have a lot to do during this stage. We send you a final preview when it’s ready and ask for sign-off or one round of notes.
Stage 5 — Revisions, delivery, and the file set
Standard scope on most projects includes one revision round. The boundary on what counts as a revision versus a scope change is something we make explicit at the start — small tweaks (material swaps, colour grading, sky changes, small composition shifts) are revisions; new cameras, new geometry, new lighting direction are scope changes. If a project needs more revision rounds than the scope allows, we say so before doing the work.
On final delivery you get the full-resolution output in the formats agreed in the brief — usually layered PSDs for stills, ProRes or H.264 for animation, plus any source assets you’ve contractually licensed. We keep working files on our servers for 12 months in case you come back wanting additional renders from the same model.
What drives cost and timeline
Two questions clients always ask: how much and how long. The honest answer to both is “it depends on the deliverable list,” but the real drivers are predictable:
- Number of cameras / shot count. A second camera angle on the same model is much cheaper than the first one.
- Model complexity. A small interior is faster than a full city block, even if both are “one render.”
- Lighting direction. Golden-hour exteriors with global illumination are slower than overcast or interior product shots.
- Revision rounds. Scope creep is the most common cause of overrun. We try to call it early.
- Animation length. Render time scales with frame count. A 30-second sequence is meaningfully different from a 60-second one.
The dedicated cost breakdown for animation and our notes on hiring an architectural CGI studio cover the numbers in more detail.
Where you sit in the workflow
Three explicit decision points: (1) approve the scope and budget at the end of Stage 1; (2) approve lighting/materials direction at the end of Stage 2; (3) approve camera framing at the end of Stage 3. After that you’re mostly waiting for delivery and reviewing once at the end. Most clients prefer it that way — we don’t ask for a review at every micro-decision because that’s how projects stretch by months without producing better work.