If you have ever tried to film a wind turbine, a hydraulic attachment, or a kitchen appliance mid-cycle, you already know why so many marketing teams end up commissioning 3D instead. This guide on how to make 3D product animation walks through the actual process we use in the studio — the steps, the tools, the rough timeline, and the moments where projects tend to go sideways. It is written for the people who are about to brief one, not for hobbyists picking up Blender for the first time.
The short version: a 3D product animation is built from a CAD or reference-modeled asset, dressed with materials and lighting, choreographed against a camera, then rendered out as frames and edited in post. Done well, the result looks like a film shoot you could never afford to stage. Done badly, it looks like a screensaver.
When 3D product animation is the right call
Not every product needs CGI. A small lifestyle accessory shot on a real table by a competent photographer can outperform a mediocre render every time. But there are several scenarios where 3D wins on cost, control, or sheer feasibility:
- The product does not exist yet. Pre-launch campaigns, crowdfunding videos, and investor decks routinely need imagery before tooling is even cut.
- The product is too big, too small, or too dangerous to film. Wind generators, mining equipment, surgical implants, internal mechanisms — live shoots are either expensive logistics or outright impossible.
- You need to show the inside. Cutaways, exploded views, and X-ray reveals are native to 3D and painful to fake on camera.
- You will need variants. Twelve colorways, three regional packaging versions, a global launch and a follow-up campaign — once the asset exists, repurposing is cheap.
- The product is boring to look at but interesting to explain. Filtration systems, B2B machinery, and industrial components benefit from animated diagrams more than glamour shots.
If your situation is closer to “we shipped one SKU and want a quick Instagram ad,” a photo studio is probably the better answer. If it is closer to “we are launching a product family and need a hero film plus eight cutdowns,” 3D pays for itself.
How to make 3D product animation: the six-stage process
Most projects in our pipeline follow the same six stages. The names vary across studios; the order rarely does. Knowing how to make 3D product animation at a professional level mostly comes down to running this sequence cleanly and not skipping the early steps.
1. Brief and reference
This is the stage that quietly decides whether the rest of the project is enjoyable or painful. We want CAD files (STEP, IGES, or native), reference photography of any existing prototype, brand guidelines, the final delivery aspect ratios, and — most importantly — a clear statement of what the viewer is supposed to do or feel by the end. A 30-second product film with no defined call to action will get rewritten three times in compositing.
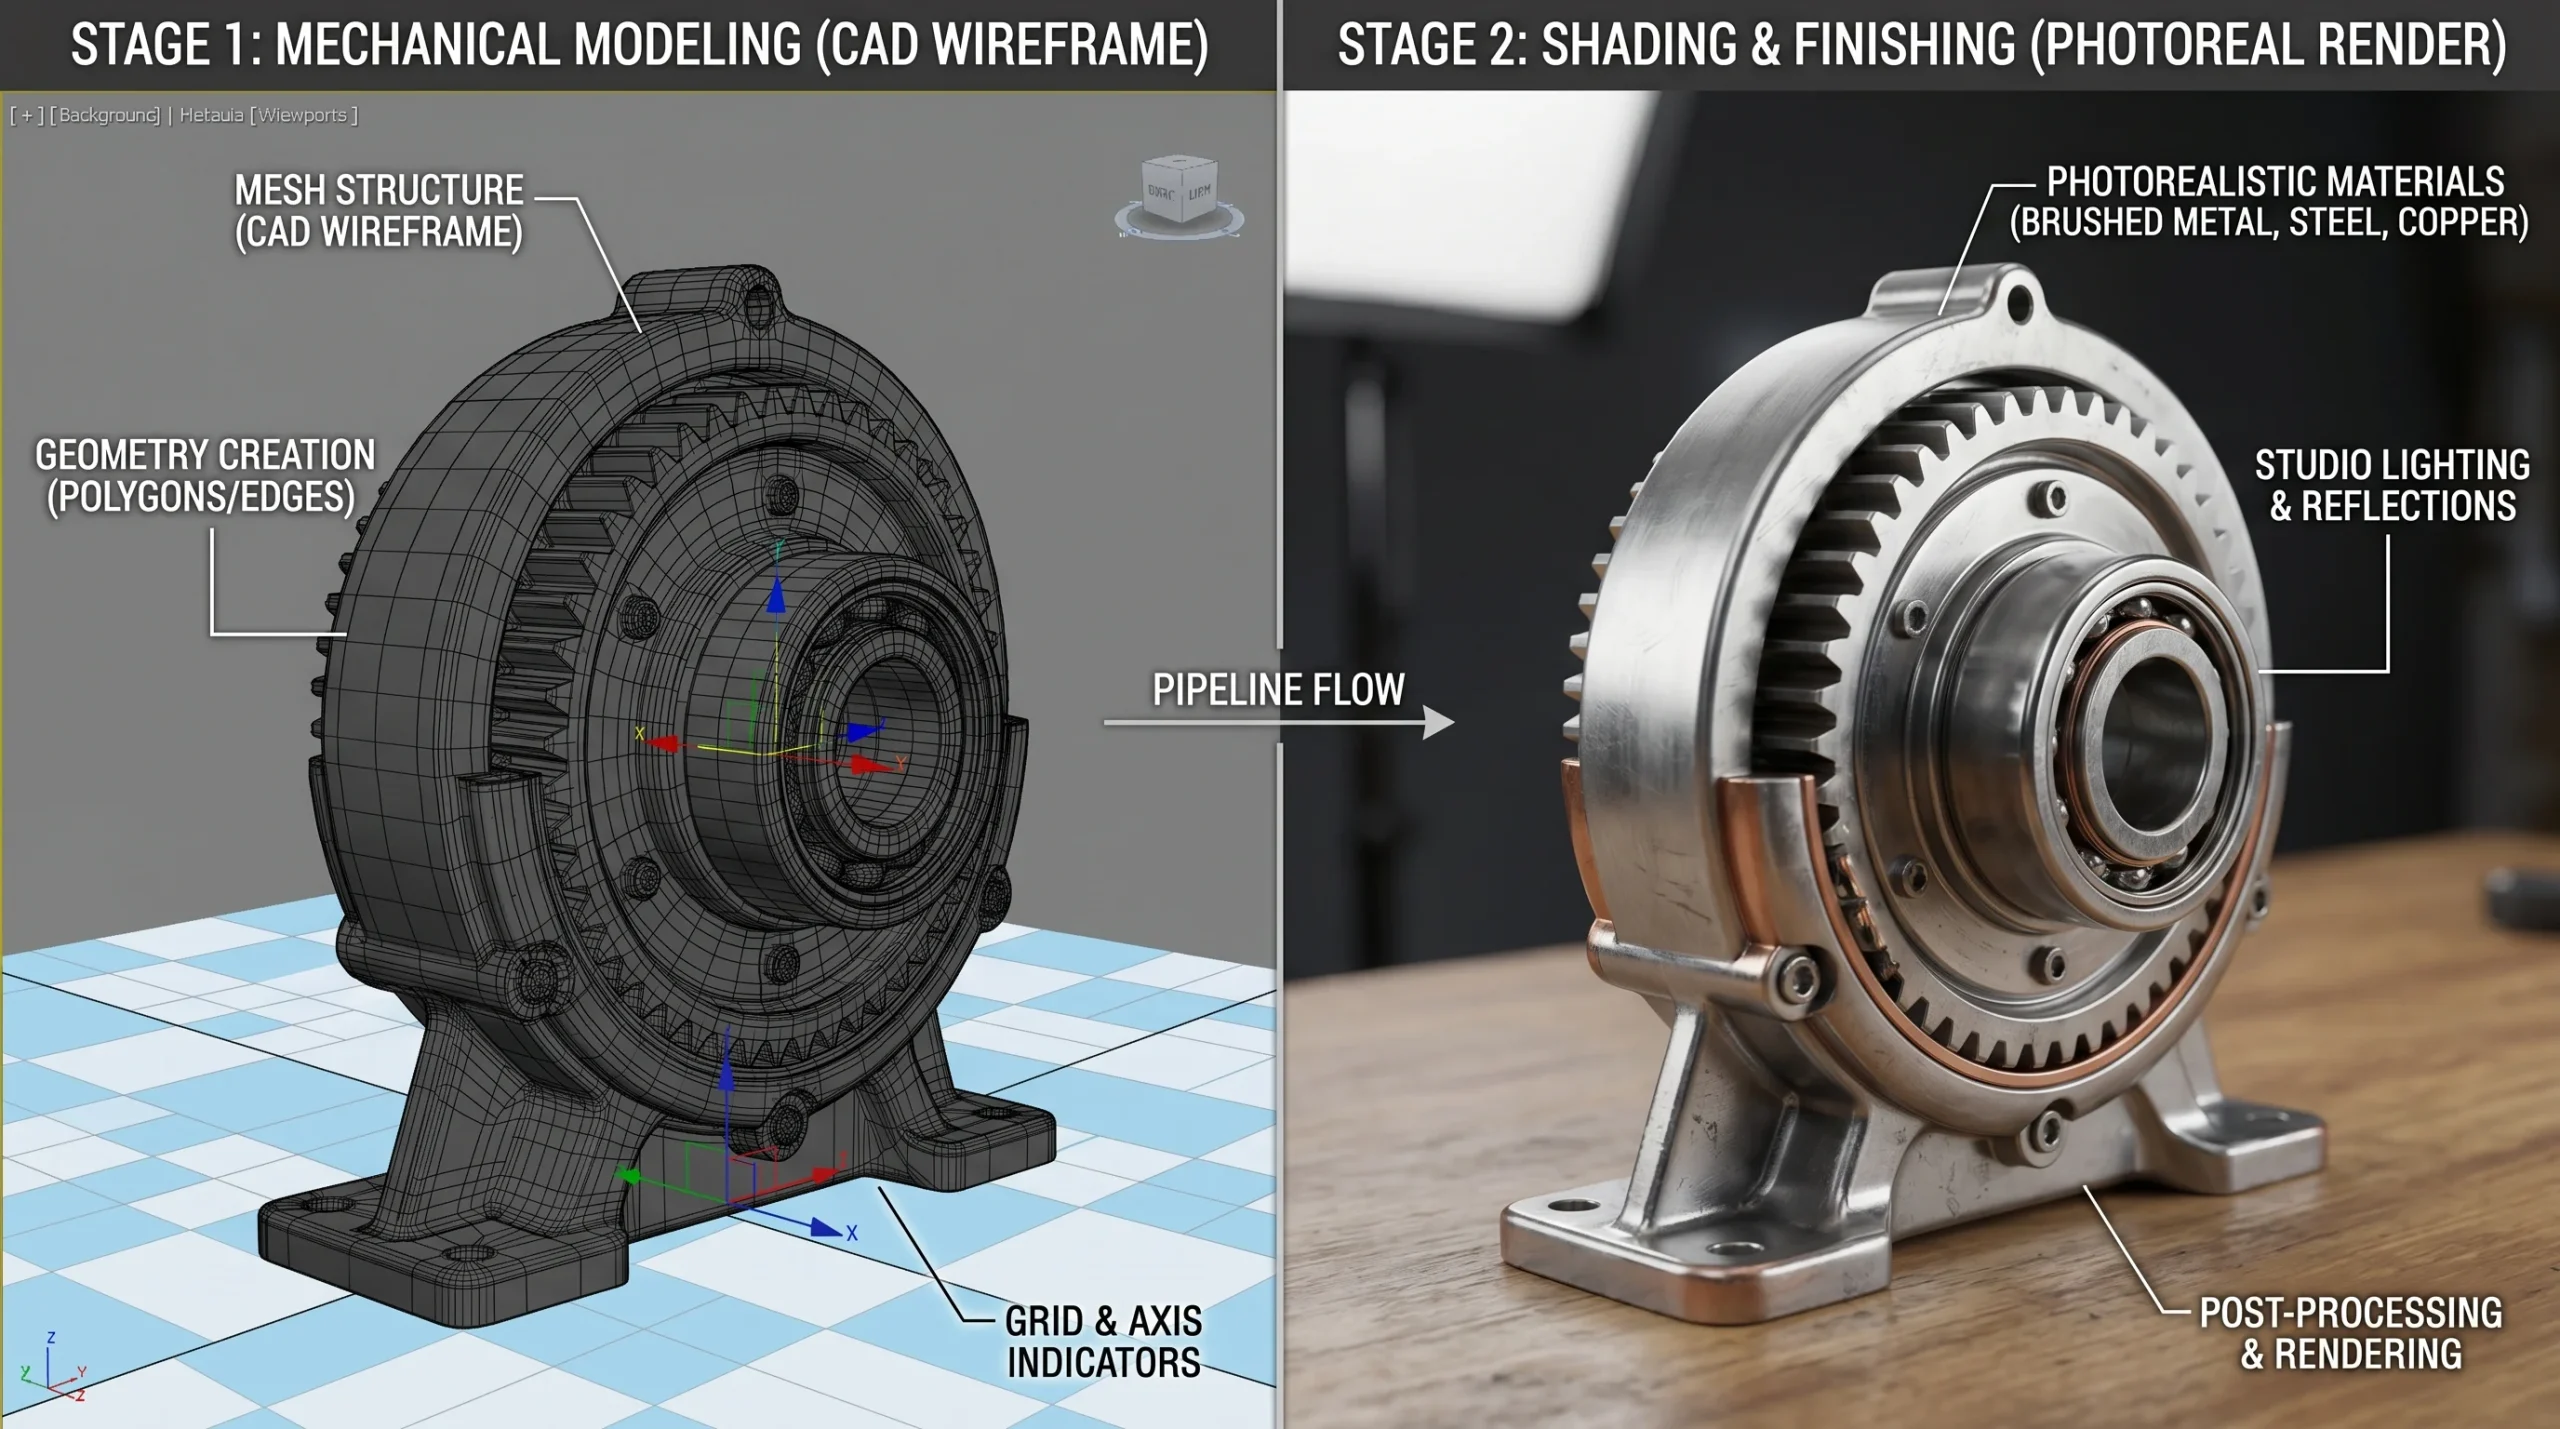
2. Modeling and CAD cleanup
Engineering CAD is almost never render-ready. Internal geometry has to be hidden, watertight surfaces fixed, fillets cleaned up, mesh densities balanced. For products built from scratch in 3D, this stage is full modeling — usually in 3ds Max or Blender, sometimes ZBrush for organic elements. This is also where decisions about resolution come in. A product that will only ever appear on TikTok does not need 4K-quality micro-detail. A hero shot that will be printed at trade-show scale does.
3. Materials, texturing, and lookdev
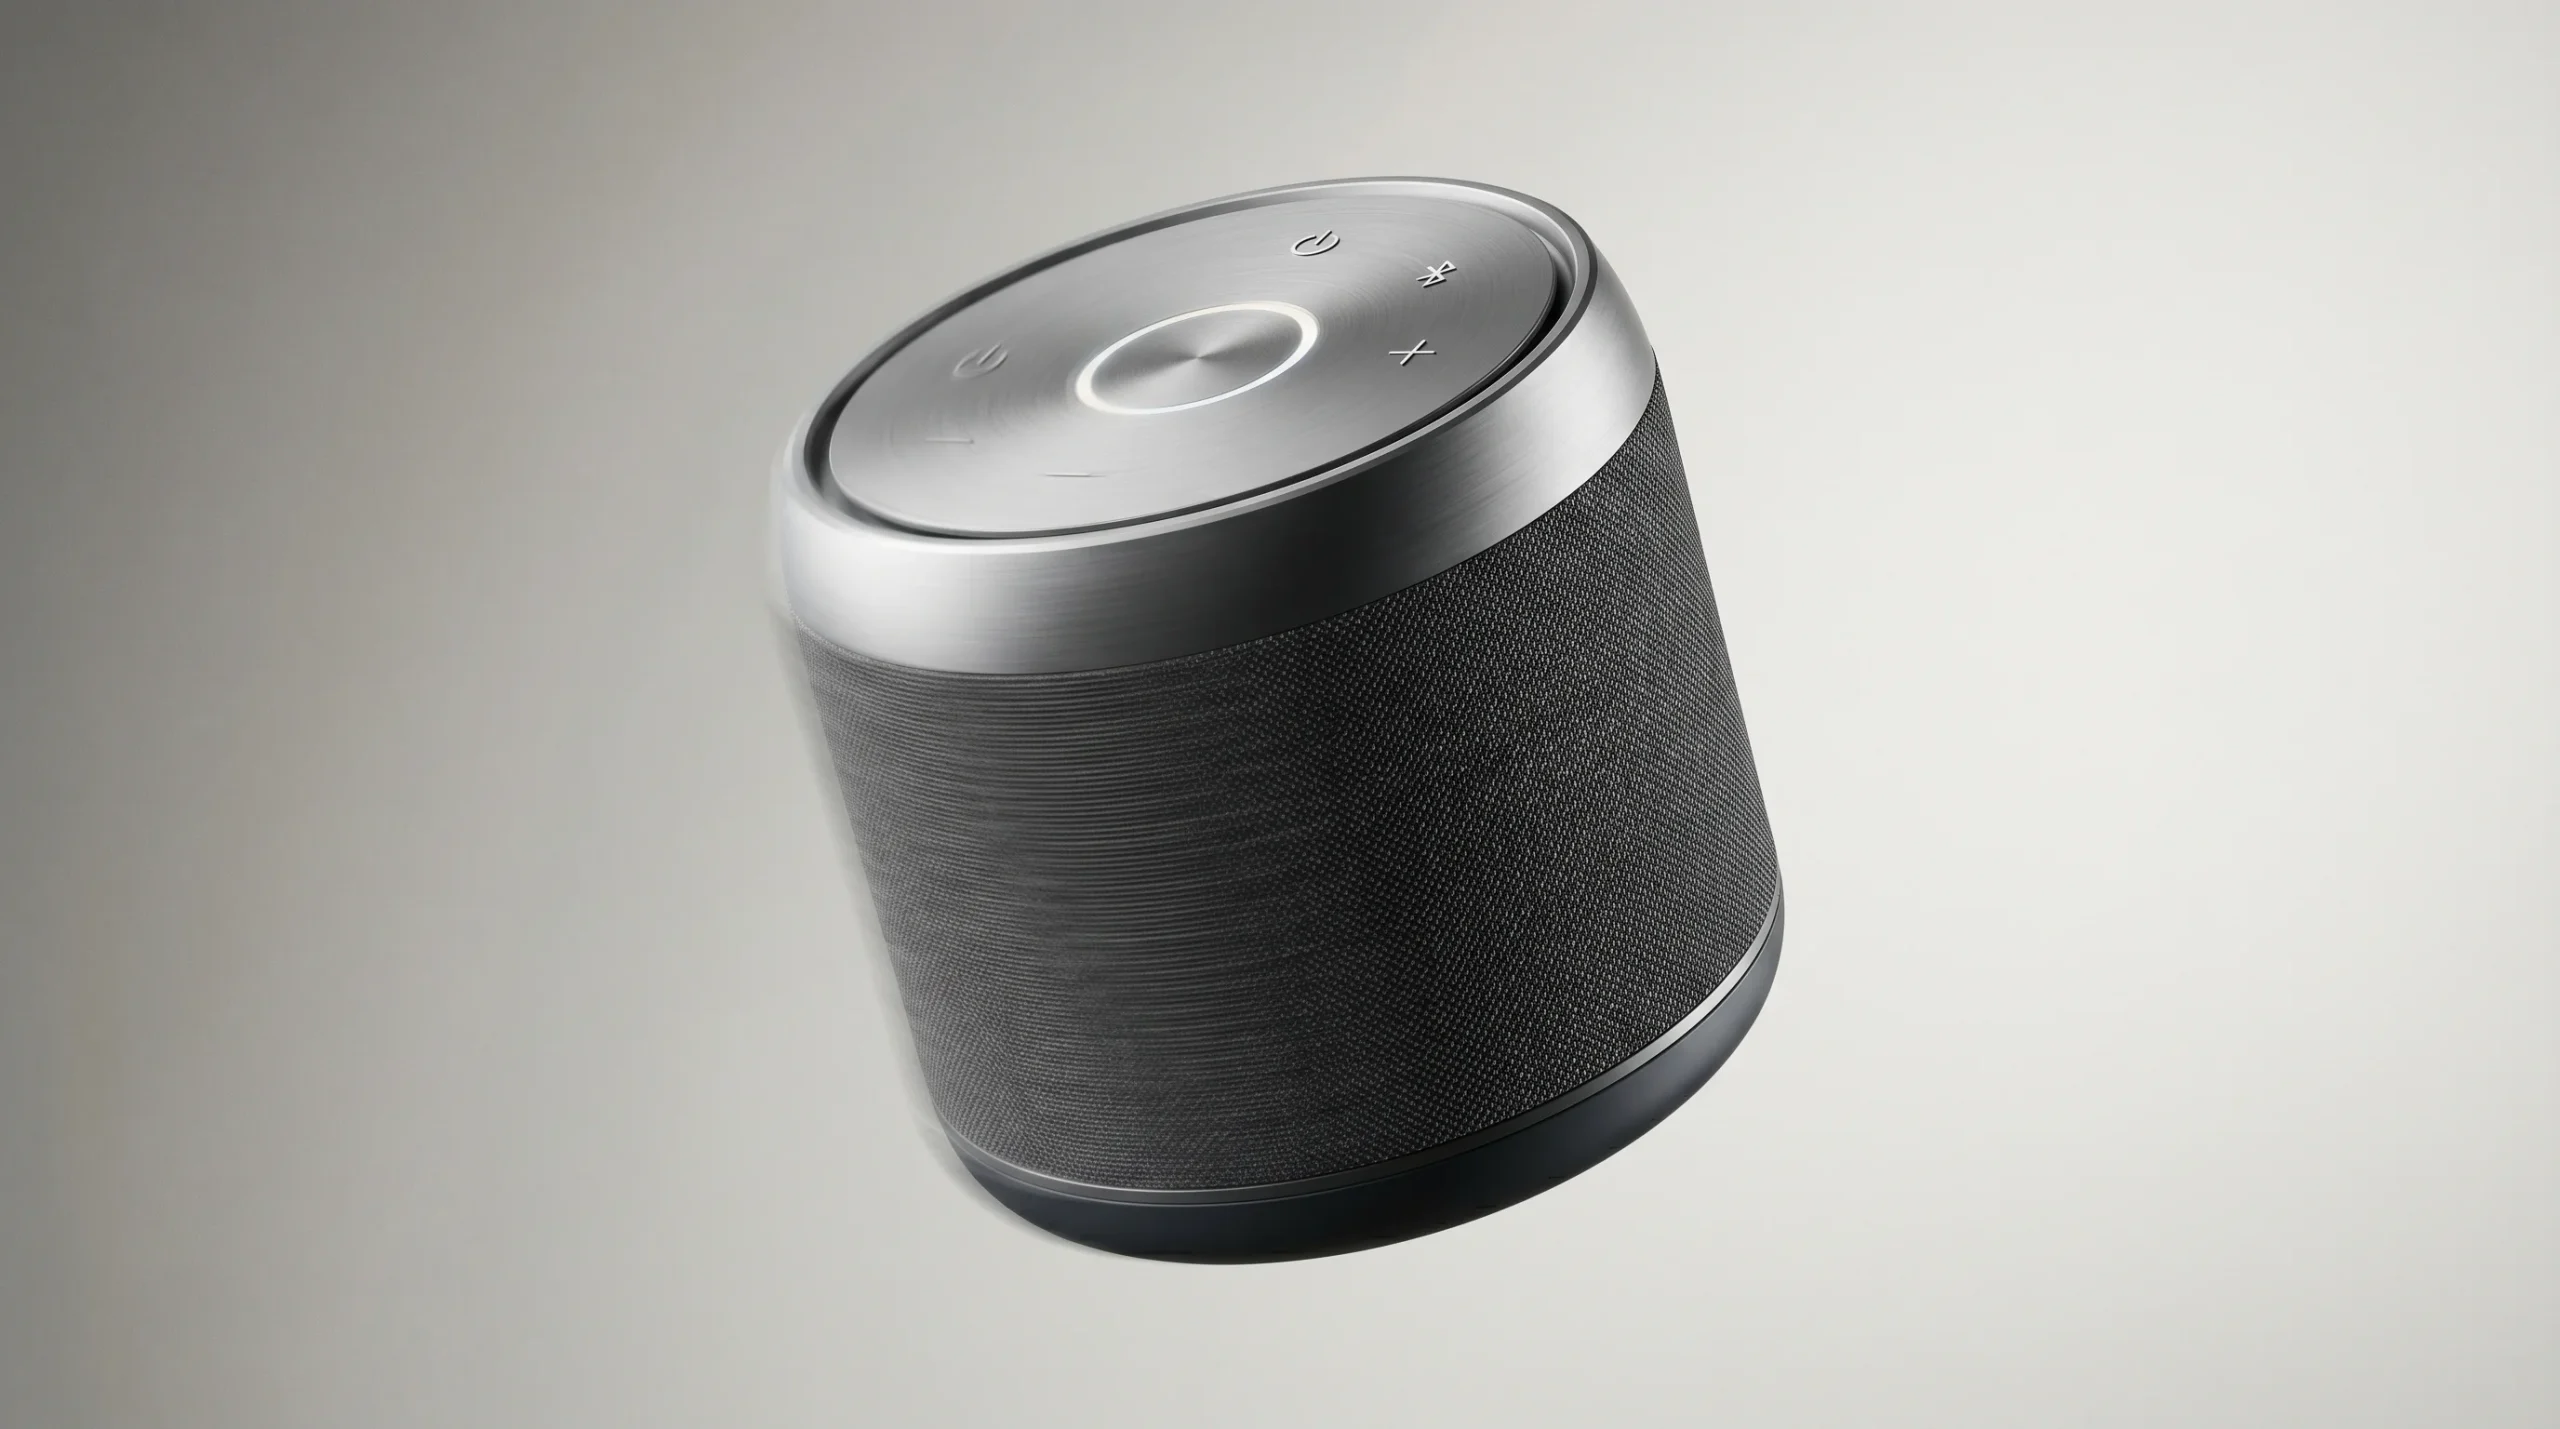
Look development is where renders earn the word “photoreal.” Brushed aluminum, anodized finishes, frosted glass, soft-touch rubber — each one is a small research project. We typically share a clay-render preview (untextured grey model) for camera and motion sign-off before locking materials. Half the value of a clay render is that everyone shuts up about texture choices until the camera angle is locked.
4. Lighting and camera
Most product animations live or die at this stage. Studio HDRI plus a few key lights, soft rim, controlled reflections. Cameras get blocked out as if it were a real shoot — focal lengths, lens height, focus pulls. We send a low-resolution animatic at this point, often without final materials, so the client can react to pacing before render times become a problem.
5. Animation and simulation
This is where the choreography happens: exploded assemblies, rotating reveals, surface ripples, liquid simulations, particle work. The biggest sin here is overdoing it. Audiences disengage from animation that constantly shows off — keep the motion in service of the product, not the other way around. For mechanical products we often build the rig once and reuse it for B-roll and social cutdowns.
6. Rendering, compositing, and edit
Frames are rendered in passes — beauty, depth, mattes, reflection, AO — and assembled in After Effects or Nuke. Color grading, motion graphics, sound design, and music happen here. Premiere Pro handles the final edit and delivery. Render times depend heavily on shot complexity, but expect a meaningful chunk of the schedule to sit in the render queue rather than at someone’s desk.
Tools we actually use
If you are evaluating bids, the studio’s tech stack tells you something. Here is what we run on a typical product animation project:
- 3ds Max and Blender — primary modeling and animation.
- Corona Renderer — our default for photoreal output; predictable lighting and clean denoising.
- ZBrush — used when organic detail (toys, characters, sculpted forms) enters the brief.
- SolidWorks — selectively, when the source CAD is mechanically complex and needs careful translation.
- After Effects, Premiere Pro — compositing, motion graphics, edit.
- Three.js / WebGL — when the deliverable is interactive (a configurator, a web showroom) rather than a linear video.
You will see other valid stacks — Maya, Cinema 4D, Houdini, Octane, Redshift. The software matters less than the team running it. For a deeper look at how related work fits together, see our 3D product visualization overview, which covers the static-render side of the same pipeline.
Realistic timelines and what affects them
A common pre-brief question is “how long does this take?” The honest answer: it depends on shot count, asset complexity, and how many rounds of feedback the team is prepared for. A single hero shot can move quickly. A 60-second multi-shot film with simulations rarely does.
The factors that move the schedule most:
- Asset complexity — a smooth-skinned consumer device vs. a piece of machinery with hundreds of parts.
- Number of camera setups — every new angle is a new lighting and rendering problem.
- Simulation work — fluids, cloth, soft bodies, particles. These eat time both at the desk and in the render farm.
- Revision cycles — every “small change” after lighting lock is, in practice, not small.
- Final resolution and frame rate — 4K at 60fps is not 1080p at 24fps with a different number on the invoice.
Serious projects always have some change orders. That is fine, and we plan for it. What is not fine is open-ended creative direction — “make it pop” three weeks in is the most expensive note in the business.
Why CGI usually beats a live shoot for product work
The cost case for 3D product animation is rarely about beating a phone-shot Instagram clip. It is about beating the version of the live shoot that actually meets the brief — studio rental, lighting crew, product handler, retoucher, reshoot day when the prototype breaks, and a follow-up shoot when marketing asks for a vertical version.
Once a product is modeled, lit, and animated, every additional output is comparatively cheap. New colorway? Re-render. Vertical aspect ratio for social? Re-frame the camera. Region-specific packaging? Swap the texture. The asset is a long-term investment, not a single-use video file. If you want to dig into the economics, our piece on what drives 3D product animation cost goes deeper.
What you should send when briefing a studio
Most projects we have ever lost momentum on lost it in the brief. To get a realistic quote and a clean kickoff, send the following:
- CAD files or modeling reference — STEP/IGES preferred; photos and dimensions if no CAD exists.
- Brand assets — logo files, typography, color palette, any existing campaign visuals.
- Reference videos — three or four animations you would like yours to feel like (and one you would hate).
- Target deliverables — durations, aspect ratios, platforms, expected uses (web, broadcast, trade show).
- Hard deadlines — campaign launch dates, trade-show dates, anything immovable.
- Decision-maker list — who signs off at each stage. The fewer surprise stakeholders, the faster the project closes.
The brief does not need to be perfect. It needs to be honest about constraints. We would rather hear “the budget is tight and the deadline is short” than learn it two weeks in.
Where 3D product animation fits in a wider campaign
A standalone product film is rarely the whole job. The same 3D asset usually anchors hero stills, social cutdowns, web banners, configurator interfaces, in-store screens, and sometimes a WebGL experience on the product page. That asset-reuse logic is why our 3D product animation service is usually scoped alongside related deliverables rather than as a one-off video commission.
If your campaign also includes architectural context — a product in a kitchen, a machine on a factory floor, a vehicle in a streetscape — that work often pulls in our broader 3D animation work as well. The handoff between product CGI and environmental CGI is its own coordination job, and worth flagging early.